pancakes for the win

Everyone has a different tradition when it comes to kicking off the holiday season. For some people it revolves around things like ‘Black Friday’ shopping, extreme home decorating or proudly wearing a truly ugly sweater. For others it’s taking the kids to see Santa, sending out that years Christmas card (after agonizing over the picture) or seeing the first flakes of snow. For me it’s all about putting up the tree. Once that white light twinkling, ornament festooned, towering cone of green takes over the corner of my great room it’s ‘game on’. (Although to be honest there have been some years when I started working on my holiday gifts in September. There was the year everyone on my gift list got a hand knit scarf and another year when everyone got baskets of homemade goodies. I made and jarred my own applesauce, bottled my own flavored vinegar and made biscotti, nutella shortbread cookies and toasted almond crack like I was the last baker on Earth. And then I designed and printed my own labels and gift tags. Yeah, that year almost killed me.)

This year however is a different story, This year ‘game on’ is more like “Umm, what? There’s a game? Where?” You see even though we put up the tree earlier than usual and the house has been in a jingle all the way state for sometime— I have yet to knit a stitch, bake a crumb or even get my Christmas cards into the mail. Between the craziness of school assignments and obligations; “Sure I’ll come read to your class on my only day off.” “Yes I remembered the cash for your (crappy and overpriced) ‘Holiday Shop’. ‘The bow on your violin is damaged? Okay let me contact the music people, work out the details of getting a new one and then remember to send the damaged back to school with you.” (I didn’t remember. They had to remind me. It took several weeks to get the new bow. It hasn’t improved his playing.) “What time is your holiday concert and what exactly qualifies as your ‘holiday best’ outfit?” Your Minecraft shirt is green, will that work?!?” “You need how many holiday cards signed and addressed by you (and only you) for your kindergarten classmates? And by when?” “Oh and stocking stuffers for each and every one of them as well? Fantastic!” “No of course were not just giving money for a boring old class gift. Special teacher presents for everyone!” Not to mention we had a soccer season that lasted until Thanksgiving and basketball practice that started soon after, the double-whammy of both kids down with step and ‘Readers Workshop’ books needing to be read nightly and the accompanying flow chart updated (Ok so we got a bit behind on that and had to read six books on one night to catch up). With all this going on I haven’t exactly had the chance to properly pull together Christmas, and now that jolly ol’ Saint Nick will be here in only a handful of days the pressure is seriously on. Which brings me to the point of this post: pancakes. Ha! Betcha didn’t see that one coming did you?

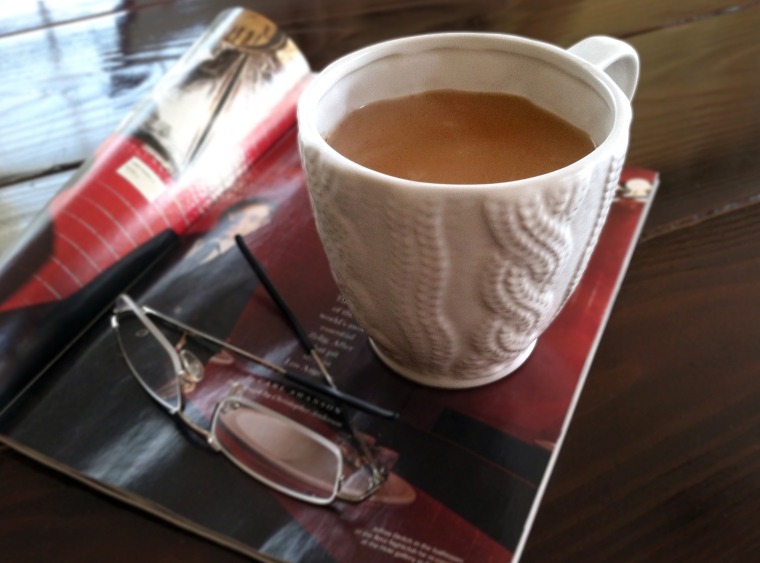
For me pancakes are synonymous with Sunday mornings and Sunday mornings have to be without a doubt my favorite part of the week. On Sunday I get to enjoy my coffee (not guzzle it down before rushing out of the house), I get to read the paper or watch the news and I get to say “What do you want for breakfast?” and have it mean something other than toast or cold cereal. Sunday is the one day that breakfast means bowls and whisks, skillets and spatulas, time and effort, comfort and care. Often that resembles a stack of pancakes. My kids love pancakes. Love them. LOVE THEM! Pancakes with chocolate chips. Pancakes with diced strawberries. Pancakes with bananas. Even pancakes straight up. If you’re offering pancakes they’re eating! And so because I like Sunday mornings and they like pancakes and I like them… I make pancakes, frequently. In fact even when the week prior has been crazed and the one coming up looks no better. When Rudolph and his team are breathing down my neck and I don’t feel remotely filled with good cheer. Even when I’m officially out of time, energy and ideas… A Sunday morning stack of pancakes is never entirely out of the question. Why? Well because pancakes make them happy and because someday I hope they look back on these Sunday morning breakfasts nostalgically. And because good homemade entirely from scratch pancakes are actually easy. “Easy like Sunday morning…”

Simple Homemade Pancakes
I know it’s easy to open a box of pre-mix and just add a little water, but this recipe really is simple and the pancakes are delicious.

pancake

2 cups whole wheat pastry flour
1 tsp. granulated sugar
1 tsp. ground cinnamon
4 tsp. baking powder
1 tsp. salt
2 eggs
1 1/2 cups low-fat milk
1/4 cup vegetable oil

  1. In a large bowl whisk together all the dry ingredients. Set aside.
  2. In a medium bowl beat the eggs, then whisk in the milk and oil.
  3. Add the wet ingredients to the dry, whisking until just incorporated and a few small lumps remain.
  4. Lightly grease a skillet or large griddle and heat. Pour 1/4 cup batter onto the hot griddle and cook until bubbles begin to form on the surface. Flip and cook the opposite side until done. Serve with butter and plenty of maple syrup.

spicy beet greens with chickpeas

My children have been away with their grandparents for the better part of the past two weeks. The first week with one set, the second with the other. That’s right, we’ve been childless for nearly 14 days. Just typing that makes me feel slightly woozy. FOURTEEN DAYS KID-FREE. (I know, the gods are clearly smiling on me.) So what you may wonder have I been up to? Well… I’ve been putting in some serious hours at work. I’ve done a significant amount of chillin’ on the deck. I’ve read a book. We met friends for drinks. I went shopping without anyone asking me “Are we almost done? How many more things do we need to buy?” We went to the movies (an advance screening of The Hundred Foot Journey to be precise). We went out to dinner. I did not watch a single TV show that revolved around Bart, Marge, Maggie and Homer, a family of British pigs who love muddy puddles or that famous duo Elsa and Ana. I got a pedicure. We actually talked to each other (imagine!) and we made things for dinner that the kids would never want to eat; Garlicky pesto over linguine, salmon with a balsamic glaze, lamb burgers with tzatziki, giant bowls of steamed mussels and one night we went totally vegan— beet greens, chickpeas, Habanero chilies and tofu with coconut milk over brown rice. Yup, I’m not kidding.

I eat vegetables everyday. Not because I think I should or because they’re good for me. I eat them daily because I love them. My family doesn’t exactly share my passion for Mother Nature’s candy, but the kids will eat baby carrots and garden fresh cucumbers for a snack, they love mashed turnips and grilled asparagus and only grumble minimally when I make grilled squash or string beans. But they draw the line at greens. Sure they can handle collards with bacon, but an arugula salad or god forbid sautéed spinach or beet greens… totally out of the question. My husband, who can deal with nearly anything but cauliflower, has come to accept that life with me involves much more than meat and potatoes.

Anyway back to the vegan meal… I stopped at the store on my way home one night thinking I’d make a coconut milk and brown rice number with some of the leftover veggies I had at home; A few bunches of fresh beets with greens that needed to be eaten, some Habanero peppers leftover from the mussels night and cherry tomatoes from my garden. I already had brown rice and chickpeas in the pantry so all I needed was coconut milk and shrimp and we’d have dinner in a flash. The shrimp ended up being both expensive and pathetic looking, totally not worth buying. I needed an alternate plan. I still wanted to add a bit more protein to the meal, but it needed to be something that required minimal prep and cooked quickly. That something turned out to be tofu. I think of tofu is a rather innocuous ingredient. It really doesn’t lend much by way of its own flavor but it’s more of a sponge for the other flavors in the dish, and it’s high in protein. So I sliced and diced, sautéed and deglazed, simmered and served and guess what… It was delicious. And vegan. And while my dearest did comment that “It would be better with sausage.” he cleaned his plate nonetheless.

The kids will be back tomorrow and while I have thoroughly enjoyed their absence, I’m ready for them to come home. I know this will mean listening to their bickering, watching their dopey kid shows and answering 50 million times the question “How many more bites do I have to take?” But I’m ready for them to return all the same.

And if you ever remind me that I said that, I’ll completely deny it.

Spicy Beet Greens with Chickpeas and Tofu 

Deilsh and vegan. Who knew… 

vegan2

1 tbsp. coconut oil
1 small yellow onion, diced
4 large cloves garlic, minced
1 tbsp. fresh ginger, grated
a handful of cherry tomatoes, diced
3 Habanero peppers, seeded and julienned
3 tbsp. lemon juice
15 oz. can chickpeas, rinsed and drained
greens from two bunches of beets, stemmed and julienned
14 oz. can coconut milk
2 tsp. salt, divided
1/4 tsp. ground cinnamon
brown rice, for serving
fresh cilantro leaves, for garnish

  1. Heat the oil in a large skillet over medium-low heat. Add the onion and cook until it becomes translucent. Add the garlic, ginger, tomatoes, Habanero peppers and 1 tsp. of salt and cook for 3 minutes, stirring frequently.
  2. Add the lemon juice to deglaze then pan then add the chickpeas and beets greens. Stir to coat well with the onion mixture and allow to cook until the greens have just begun to wilt.
  3. Add in the coconut milk, remaining teaspoon of salt and ground cinnamon. Bring the mixture to a simmer then turn down the heat to low and cook for 5-10 minutes or until the chickpeas just begin to soften.
  4. Serve over brown rice and garnish with fresh cilantro leaves.

the almond milk rescue

I was still on a high from last weeks pretzel success and feeling rather invincible when I decided that this week I would make another attempt at baking “the perfect crusty loaf”. Going back to work has seriously affected the amount of time I have to cook, so when I found a recipe that actually read “1. Mix together all the ingredients in the morning before you go to work. 2. Leave it in the warmest spot in your kitchen and allow to rise for 6-8 hours. 3. When you come home from work…” Are you kidding?!? I had joked that 2014 might be the year I finally achieved baking success, but I didn’t actually believe it. So before I left for work one morning I followed the recipe directions (seriously, I did!); mixed together the ingredients, left the covered bowl in a warm spot, said a quick prayer to the baking gods and hustled myself and the kids out the door. Flash forward eight hours to the biggest epic fail of my baking career. BIGGEST. EPIC. FAIL. After an eight-hour rise the dough was still fairly flat, I gave it a quick knead and attempted a second proofing only to be left with a big sticky mess to clean up and to top the disastrous attempt off nicely—the loaf stuck like glue to the bottom of my brand new dutch oven. Sigh… Calgon take me away.

It seemed a little early for a glass of wine and while I love coffee; freshly ground, freshly brewed, strong coffee, if you know me then you know that the only time of day I actually drink it (or anything caffeinated for that matter) is in the morning. If I need something warm and soothing later in the day then its usually a cup of decaf chai tea with a splash of milk—I love the creamy, spicy warmth that comes with chai. I’ve recently started making green smoothies again which means that I have always have almond milk in the house. I started tinkering around with other ways to use almond milk and discovered that when you heat it up and add lots of spices to it you wind up with the perfect warm, smoothing chai-type drink. Sure it won’t make you the queen of all bakers, but it will warm you from the inside out and offer you a few moments to regroup before the next “perfect crusty loaf” recipe comes along.

Warm Spiced Almond Milk
This recipe also works with regular milk, however I actually prefer it with the almond milk.

almond milk5

2 cups almond-coconut milk
1 tsp. ground cinnamon
1/2 tsp. ground nutmeg
1/4 tsp. ground ginger
1/4 tsp. ground cloves
1/4 tsp. ground black pepper
1/4 tsp. Chinese Five Spice
1/2 tsp. real vanilla extract
2 tsp. honey

  1. Place all the ingredients in a small saucepan. Heat over a medium flame, stirring frequently, until the milk is hot but has not yet begun to simmer.
  2. Stain milk mixture through a fine mesh strainer and into a large mug and enjoy!

make you a convert cookies

It’s that time of year again. The time of year that parents of school aged children dream about for nine months. The time of year when memories of endless school projects, fundraisers and homework are slowly being shed like winter coats. Yes that’s right, it’s finally, thankfully and just-in-the-nick-of-time-or-I-really-might-have-lost-it… the end of the school year!

But just as I’m getting ready to heave a giant sigh of relief along come the notices about end of the year parties, plays, picnics etc. All of which would be very happy to accept my donation of a baked good (“peanut-free and at least a dozen please.”) Of course I’ll send something along, how could I not, but I feel as though I’ve managed to paint myself into a bit of a corner. I’ve shown up to enough events and class birthday’s with something yummy in hand that now at the end of year when I’m just plumb tired, I have to “bring it” one final time. Sigh. Me and my big mouth and weekly blog.

I considered making cupcakes but I figured the dessert table would be awash in them. Then I thought about some lemons bars; but the recipe literally only makes a dozen. What if they turned out so delicious that there was a stampede trying to get to the dessert table. And what if several little people were injured in the may lay and never able to look at a lemon bar again without having flashbacks— I’d feel terrible! So I settled on cookies, ya can’t go wrong with a cookie (that’s my motto anyway) and I knew just which recipe to make.

As you may recall I collect cookie jars and while most of them hold bric-a-brac and dust bunnies, one is usually filled with something freshly baked. A wide variety of cookies come and go through that jar, but some that never hang around long enough to get stale are my Cherry & Chocolate Oatmeal Cookies. I know what some of you are thinking, “I don’t like oatmeal cookies.” I’m with you, I usually don’t either. I don’t like their grainy texture or how overly spiced and sweet they usually are. And I can’t stand raisins in my cookies (don’t even get me started on walnuts in my brownies!) Anyway, the oatmeal cookies you’re thinking of and writing off as not for you, are not these cookies. These are without a doubt the oatmeal cookies that will covert you.

Cherry & Chocolate Oatmeal Cookies
These are my go to cookies when I have to show up somewhere with treats. The recipe makes about 2 1/2 dozen large cookies, plenty to take to school and enjoy a few at home as well!

oat-choc cookies3

1 1/4 cups white whole-wheat flour
1 cup quick cook oats
1/2 tsp. baking powder
1/2 tsp. baking soda
1/4 tsp. ground cinnamon
1/4 tsp. salt
1 stick unsalted butter, melted
3/4 cup packed brown sugar
1/4 cup granulated sugar
1 1/2 tsp. pure vanilla extract
1 large egg
2 tbsp. 2% milk
1/2 cup dried cherries (or cranberries)
1 12 oz. bag dark chocolate morsels

  1. Preheat oven to 350° F. Line two baking sheets with parchment paper and set aside.
  2. Mix together the flour, oatmeal, baking powder, baking soda, cinnamon and salt in small bowl.
  3. In large bowl beat together the butter, brown sugar, granulated sugar and vanilla until creamy. Scrape down the bowl and add the egg and milk. Beat until well combined and a batter has formed.
  4. Add the flour/oat mixture to the batter mixture and gently stir to combine (it will seem dry but not to worry). Add the cherries and chocolate morsels and stir until blended. Drop by rounded tablespoon (or cookie scoop) onto the baking sheets. (The cookies will spread a bit so be sure to leave enough room between each one.)
  5. Bake for 17-20 minutes or until the tops are lightly browned but centers are still soft. Cool on wire racks, then try and eat just one.

oh the almond joy!

My family is crazy about almonds. They like peanuts fine and won’t say no to a pistachio or two, but watch out if there’s a bowl of almonds around! I also happen to like almonds; I put them on salads, in snack bars and on my morning yogurt, but for me it’s not just about the taste. Almonds are one of the healthiest of all tree nuts; they’re naturally high in protein, fiber, calcium and heart-healthy fats. These same attributes, not to mention their satisfying crunch, means that it only takes a handful (1 ounce or roughly 24 ) to help you (or me) feel full and replenished.

The other day I was in Target and I was starving. I wanted to grab something quick that I could eat on the drive to my daughter’s school, but I didn’t want junk. I took a quick stroll through the nut aisle and spotted a box of Emerald 100 Calorie Pack Cinnamon Roasted Almonds. 100 calories…reasonably healthy…easy to scarf down while driving…Sold! I was pleasantly surprised to discover that they were really tasty; not too sweet, perfectly crunchy and just enough in the package to make you feel satisfied but not guilty. I squirreled away the remains of my little box of nuts and happily snacked on them on and off during the week. And then the damn kids discovered them and ate the last bag on me. Sigh, kids. So I decided I should try to make them myself.

It wasn’t hard to find a roasted almond recipe, the world is apparently nuts for nuts, but most of the recipes I read were for candied almonds. Then I stumbled upon a clean eating blog and found inspiration! The original recipe was for cocoa covered almonds (which I’m sure are tasty but I haven’t tried), I instead tweaked it up and created cinnamon roasted almonds even better then what the folks over at Emerald are cranking out.

And in case you’re wondering, yes I was sure to make enough of these almonds to share with my family and I even gave some away as gifts. But you better believe I’ve got a secret stash all my own tucked away. Take that kids!

Cinnamon Roasted Almonds
These are fantastic as a snack right out of the jar, tossed in a salad, or sprinkled on yogurt and can easily be doubled or tripled. Just be sure to hide some for yourself before sharing them with your kids.

cinnamon almonds

1 cup raw almonds
1 tbsp. real maple syrup
1 tbsp. ground cinnamon
1 tbsp. white whole wheat flour (or all-purpose)

  1. Preheat your oven to 275°F. Line a pie plate with parchment paper and set aside.
  2. Place almonds in a large bowl and drizzle with the maple syrup, stir well to evenly coat all the nuts.
  3. Place the cinnamon and flour in a small bowl and mix together. Sprinkle a few spoonfuls over the almonds and stir to blend. Continue the process with the remaining cinnamon mixture until it’s finished and the almonds are completely covered.
  4. Spread the nuts out in an even layer in the pie plate and roast for 25 minutes, stirring every 5 minutes, until fragrant and crunchy.
  5. Gather together parchment paper and carefully lift it and almonds out of pie plate. Spread the nuts out on parchment and allow to cool for 10 minutes before scarfing down (or storing in an airtight container).

*adapted from clean eating chelsey

nana’s sweet apple + chicken curry

jim+nanaMy husband comes from a long line of stovetop dusting, dialing for dinner, non-cooks. This is not a criticism, rather a statement of fact. If pressed they can all whip up a perfectly fine meal, they just would rather not. However amidst all the pizza, McDonald’s and chicken rondelets of his childhood one truly from scratch meal does proudly stand out in his memories:
his grandmother’s curry.

I too happen to love curry and have made more than a few versions over the years. My husbands reaction to my curry however is always the same… sheer delight that curry is for dinner followed quickly by disappointment that it’s not like his grandmother’s. She traditionally makes curry with the leftover lamb or pork roast from a holiday dinner, to which she adds sweet apples, onions and a little bit of spice. I’m from the coconut milk, peanut, cilantro school of curry— which I imagine is why we’re at a curry crossroads. I’ve asked her for the recipe before, in fact we spoke about it before I attempted my version, but she says she doesn’t really have one. She’s been making her curry for so long that she just knows when its right. Oh well.

The other day I was reading the food section of the paper and lo and behold there was a recipe for Sweet Apple Curry which sounded exactly like the curry my husband’s childhood memories were based on. The article claimed that as far a curries go this recipe was totally inauthentic, but absolutely delicious nonetheless. Naturally I headed straight to the store and set about attempting to duplicate his Nana’s beloved recipe.

I’m not a big fan of lamb and pork just didn’t seem right to me, so I used chicken thighs instead. I served it on Jasmine rice just like she does and I kept it fragrant, flavorful and mildly spiced. Seriously I pulled out all the memory triggering stops on this one and I’ll give you one guess how it turned out… A total success! My other half said it was the closest thing to his Nana’s that he’d ever had. Quite the compliment indeed! Just like the article said; inauthentic but delicious.

So if you know Ginny and love her famous post-holiday curry, rest assured that her recipe (or at least an approximation of it) can now live on…

Sweet Apple & Chicken Curry
This is a sweet and mild curry, however if you’re like me and enjoy a little kick in everything you eat add a few diced chilies for garnish.

nanas curry2

3 ribs celery, diced
2 large onions, diced
4 cloves garlic, grated
3 Granny Smith apples, peeled and cored
3 lbs. boneless/skinless chicken thighs
1/2 cup flour
1/2 tsp. pink salt
1/2 tsp. black pepper
6 tbsp. olive oil, divided
4 tbsp. unsalted butter
2 tbsp. mild curry powder
1 tsp. ground cinnamon
1 tsp. ground cumin
1/4 cup flour
3 cups chicken broth
1 tbsp. corn starch
1 tbsp. cold water
Jasmine rice, for serving
minced fresh cilantro, for garnish (optional)
diced chilies, for garnish (optional)

  1. Trim the chicken and cut into bite-size pieces. Place in a quart-size ziploc bag, along with 1/2 cup of flour, salt and pepper. Seal and shake to coat evenly. Set aside.
  2. Dice the celery and onion and grate the garlic, set aside. Peel and core the apples and cut them into medium-size chunks. Set aside in a separate bowl.
  3. Heat the oil, 2 tablespoons at a time, in a pot over medium heat. Working in batches, add the coated chicken and cook until lightly browned on all sides; transfer to a bowl.
  4. Melt the butter in the pot you just finished browning the chicken in. Add the celery, onion and garlic and cook for 5 minutes, stirring frequently, until the onions have become transparent. Add the apples and stir to incorporate; cook for another 5 minutes, then add in the curry powder, cinnamon and cumin. Cook for 2 minutes, until the spices become fragrant.
  5. Sprinkle the apple mixture with a 1/4 cup of flour and stir to incorporate. Cook for 2 minutes, then add the broth along with the chicken pieces and any accumulated juices. Increase the heat to medium-high and bring mixture to a simmer. In a small dish mix together the corn starch and cold water. Add it to the curry mixture and allow to simmer for about 10 minutes, until the sauce has thickened and the chicken is cooked through.
  6. When finished, remove the pan from the heat and let sit for a several minutes before serving. Serve over hot Jasmine rice and garnish with diced cilantro and diced chilies, if you like.

*adapted from the washington post

Criss-Cross Applesauce

I love Fall, it’s absolutely my favorite season. I love the beautiful blanket of falling leaves (it drives me crazy that here in Northern NJ everyone sweeps up their leaves the minute they hit the ground); I love the chill in the air; I love the contrast between the bright blue sky and Mother Nature’s muted colors; I even love the cool, earthy and slightly damp way the season smells. And there is no food that says Fall to me more perfectly than apples.

It seems like this time of year everyone you talk to has either just gone apple picking or has plans to. (Although truth be told, the Greco family prefers to apple pick mid-August in Vermont. Sorry N.J., but you really can’t compete.) Anyway, back to those apples. If you in fact do go apple picking then you’re probably like me and end up bringing home way more than you and your family can possibly eat out of hand. And seriously how many pies does any one person feel compelled to make? So to use up all those lovely fresh picked apples I make applesauce. In the past I would make it on the stove top and just let it cook until it was mushy and “done”. Then I discovered a Martha Stewart recipe for roasted applesauce. Hello delicious!

This is honestly some of the best applesauce I’ve ever tasted. It’s loaded with wonderful spices, takes less than an hour to make and freezes beautifully. My family likes to eat it in the morning with toast, at dinner alongside chicken or pork chops and warmed up with a bit of vanilla ice cream for dessert. I promise that after making this roasted version you’ll never bother with the stove top kind again.

Roasted Applesauce
Roasting the apples rather than cooking them on the stove really gives this applesauce a much more complex flavor.

1/4 cup water
4 tbsp. packed brown sugar
3 tsp. fresh lemon juice
a big pinch of salt
3 tbsp. unsalted butter, melted
3 lbs. apples (about 10-12)
1 tsp. ground cinnamon
1/8 tsp. nutmeg
1/8 tsp. ground cloves

  1. Preheat oven to 400°F. Peel, core and cut apples into medium size chunks. Place in a large bowl and set aside.
  2. Combine water, sugar, lemon juice, melted butter and salt in a small bowl. Stir until blended and sugar has dissolved.
  3. Pour sugar mixture over the apples and toss to coat well. Place apples in a large baking dish, cover tightly with foil and roast 40 minutes.
  4. Let cool slightly then mash apples with a fork. Adjust spices (if needed) and serve warm over vanilla ice cream, at room temperature, or freeze for a later date.

*adapted from martha stewart

Move Over Kozy Shack…

A few weeks ago my daughter discovered the classic children’s book The Poky Little Puppy. It’s been her number one choice for afternoon reading and bedtime story ever since. She never tires of hearing about the puppies heading roly-poly, pell-mell and tumble-bumble down the hill. She tisk-tisks when the fresh puppies get scolded by their mamma and is delighted when the poky puppy gets to eat up all the rice pudding and chocolate custard. But I’ll be honest with you, The Poky Little Puppy is beginning to get on my nerves. Seriously, the same book every night for weeks on end— I challenge you not to grow weary too! But she loves the story, so we read it again and again and again. Anyway, thanks to a certain little puppy I’ve been thinking about rice pudding lately.

In my mind there really is no middle ground when it comes to rice pudding, you either love it or you don’t. And the same goes for whether you prefer it with raisins or you think it’s at it’s best unadulterated. Personally I can’t think of a more soothing dessert than a bowl of rice pudding (without raisins) topped with a nice dollop of whipped cream. Mmmm…

In the past I’ve made rice pudding with brown rice and coconut milk, and while it wasn’t bad it certainly wasn’t the rice pudding you remember from childhood. But this recipe is. It’s rich and creamy and not overly sweet, really it’s near rice pudding perfection with one exception… it only makes a small quantity of rice pudding! Now perhaps in your house this isn’t an issue, but in mine things could get ugly pretty quickly if someone feels they haven’t gotten their fair share. Naturally my solution was to double the recipe which not only made enough to satisfy the crazies I live with, but also gave me enough to share with my visiting parents. Happiness reigned! Oh and that night my mother got the pleasure of reading The Poky Little Puppy to her granddaughter before bed. It was a win-win situation all around…

Classic Arborio Rice Pudding
When it comes to rice pudding my family is a bunch of purists. In other words— no raisins, ever! But feel free to add them to yours if you wish. 

1 cup water
a pinch salt
1/2 tbsp. butter
1/2 cup Arborio rice
2 cups whole milk
2 tbsp. sugar
1 tsp. vanilla extract
1/2 tsp. cinnamon
whipped cream, for topping

  1. Bring water, salt, and butter to a boil in a medium saucepan. Add the rice, return to a boil, cover and then reduce the heat to the lowest setting. Allow to cook, stirring frequently, until the rice has absorbed most of the water but it still al dente, about 8-12 minutes.
  2. Meanwhile bring the milk, sugar, vanilla, and cinnamon to a simmer in a small saucepan. Add the warm milk mixture to the cooked rice and continue to simmer over medium-low heat, stirring often, until the rice absorbs most of the milk and mixture starts to get thicken, about 15-18 minutes.
  3. Transfer the pudding to a serving dish. Cover with plastic wrap, pressing it onto the surface, and allow to cool until set. Serve warm with a sprinkle of cinnamon and a dollop of whipped cream, or chill for a later date.

*adapted from the food network

Homemade Whipped Cream
It’s so easy to make your own whipped cream it’s really not worth wasting your time (and money) buying it.

1 cup heavy cream
2 tbsp. powdered sugar
1 teaspoon vanilla

  1. Put all the ingredients in a medium high-sided bowl. With a hand mixer on low, whip cream until it begins to firm up. Slowly increase speed to high and beat until the whipped cream holds it’s shape when you lift out the beaters. Use immediately and enjoy!

Baking with my Cookie

“Let’s make cookies!” my daughter says on the way home from nursery school one afternoon. “Oh baby, I don’t have the ingredients for cookies, next time I go to the store I’ll get some.” “Yes you do” she replies, “sugar, flour, milk and eggs…” Hmmm, my two-and-a-half year old budding chef might be right, we in fact could make sugar cookies with the ingredients she just rattled off. So, since she specifically requested a little kitchen time with mom (and I would hate to deny my sweet girl), it looked like we’d be baking after lunch.

Here’s something you may not know about me, I don’t like to do anything if it seems too easy. I guess I equate a certain degree of effort with a successful final product. I’m sure plain sugar cookies would of been fine and certainly would of satisfied my daughter’s desire to bake, but in my little head that would of been too simple. I had to make sugar cookies that were a bit fancier. Cookies with some added cinnamon and nutmeg in the dough and then a quick roll in more cinnamon and sugar before baking. Yeah, those are my kinda sugar cookies!

So how did our little mother-daughter baking session go? Well, as is often the case with a two-and-a-half year old her enthusiasm for the project didn’t last long. Once the ingredients were measured and the stand mixer switched on, she was more interested in pillaging the fruit bowl and helping herself to cheese sticks from the fridge. Oh well, there’s always next time.

But the final results, seriously delicious.

Cinnamon-Sugar Cookies
These cookies are fantastic as is or with a glass of cold milk. They’re even better along side of a scoop of vanilla ice cream.


12 tbsp. Smart Balance spread
3/4 cup granulated sugar
1/2 cup brown sugar
1/4 cup honey
1 1/2 tsp. baking powder
1/2 tsp. baking soda
1 tsp. creme of tarter
1 tsp. ground cinnamon
1/2 tsp. ground nutmeg
1/2 tsp. salt
1 tsp. vanilla extract
2 tbsp. milk
1 egg
3 cups flour

For the cinnamon sugar topping:
3 tbsp. granulated sugar
1/2 tsp. ground cinnamon

  1. Preheat the oven to 350°F and line two baking sheets with parchment paper. In a small bowl mix together the cinnamon and sugar for topping, set aside.
  2. To make the dough cream together the softened butter, sugar, brown sugar, honey, baking powder, baking soda, creme of tarter, cinnamon, nutmeg, vanilla and salt. Add the egg and milk and blend into the butter mixture, then slowly stir in the flour.
  3. Scoop out rounded tablespoons of the dough (it will be very soft), shape them into balls, and roll each ball in the cinnamon sugar mixture. Place each ball on the prepared cookie sheet, about 2 inches apart. Bake for 12-16 minutes, until the cookie is golden brown and the tops have begun to crack.
  4. Allow to cool on a wire rack and then try to eat just one. Store remainder in an air tight container.

* I realize you may think I’m crazy to use anything other than butter to make these cookies. I agree it’s unorthodox but here’s the thing, I tested this cookie recipe three times and on the last try I ran out of butter and substituted Smart Balance. While the butter cookies were good, they got hard very quickly sitting in my cookie jar, but the Smart Balance cookies stayed soft and yummy for days. Like the saying goes, “necessity is the mother of invention”…