Featured

Who you callin’ a tart?

Hey there. And welcome back to that wonderful time of year when locally grown produce is available nearly EVERYWHERE, particularly tomatoes and eggplant. We routinely turn our homegrown tomatoes into roasted red sauce, caprese salad, and salsa and grill up eggplant for sandwiches and salads but sometimes we long for something different. Behold the something different; A Fresh Tomato and Eggplant Tart.

When this recipe found its way into my orbit I thought; “Yeah, why not?” I already had all the ingredients and it seemed pretty straight forward, although I was a little skeptical about what seemed like an overly complicated step involving cooking the eggplant. (My skepticism was unfounded, in fact the step makes the cooking of the eggplant so stupid easy and delicious that my eggplant averse husband tried a few extra slices and thought they’d make awesome little hors d’oeuvres. So take that for what its worth.)

Anyway, whatever you’re doing right now stop, and go make this tart. You won’t be disappointed. Go harvest from your garden or swing by the buy farmstand for tomatoes and eggplant, defrost that red sauce in your freezer, mince a little fresh basil and get ready to be blown away.

Eggplant and Tomato Tart
1 pie crust (store bought or homemade)
1 large eggplant
salt
4-5 eggs
1/4 cup milk
1 1/2 cups marinara suace
2 tbsp fresh basil leaves, julienned
1/2 cut grated parmesan
8 oz fresh mozzarella, shredded
2 large fresh tomatoes, sliced
olive oil

  1. Line a lightly oil a 9 or 10-inch tart pan with the dough, pierce the bottom. Refrigerate for 30 minutes then pre-bake (with pie weights or beans) at 350 degrees for 25 minutes. Remove from the oven and set aside.
  2. Increase the oven temp to 400 degrees. Slice the eggplant about 1/3 inch thick and toss with salt to taste and drizzle with olive oil. Line 1 to 2 baking sheets (as needed) with foil and brush the foil with olive oil. Lay the eggplant slices on the foil in 1 layer. Roast in the oven for 15 minutes, until the slices are soft when pierced with a knife and browned in spots. Remove from the oven and carefully fold the foil up over the eggplant slices. Crimp the edges of the foil and allow the eggplant to steam for another 15 to 20 minutes. It should now be completely cooked. Turn the oven down to 350 degrees.
  3. Beat together the eggs in a medium bowl. Set the tart pan on a baking sheet to allow for easy handling. Whisk the milk into the eggs. Spread 3/4 of a cup of tomato sauce over the bottom of the crust. Top with a layer of eggplant slices, shredded mozzarella and basil. Spoon the remaining sauce over the eggplant and sprinkle with basil, Parmesan, and mozzarella. Repeat the layers until your eggplant is gone.
  4. Arrange the sliced tomatoes on top of the eggplant and sprinkle with the remaining mozzarella (shred a little more if you need to) parmesan and basil. Pour on the eggs over everything. They should seep down into the layers; if it looks like it’s not moving and going to overflow the crust, use a fork to create some holes so it does seep down. Place in the oven and bake for 40 to 45 minutes, until set and bubbling and browned on the top and edges. Remove from the heat and allow to sit for at least 20 minutes before serving. Thank me later.

No More Butternut Blues

My pantry is literally overflowing with Winter squash; multiple Butternut, Acorn, Spaghetti and Kobacha to be exact. I’ve used them roasted in enchiladas, mashed them, turned them into fries and offered them to neighbors… yet my stock seems forever bountiful in the worst of ways. Today I roasted a butternut with shallots, garlic and fresh sage and turned it into a sauce that I served over thick Thai noodles. Holy ‘what do you mean there aren’t leftovers’ delish dinner moment. And if you’re not into pasta I can imagine keeping the sauce on the thick side, putting a puddle of it in a shallow bowl and topping it with a nice piece of pan seared fish. Bon appétit.

Butternut Squash Pasta Sauce
1 medium butternut squash (about 1 1/2 pounds) 
1 tablespoon olive oil 
handful fresh sage, chopped
3 lg shallots 
salt 
10 cloves garlic
1 cup fat free half and half*
2 cups chicken stock 
pasta, for serving
Optional toppings: Grated cheese, chopped toasted walnuts, fried fresh sage

1. Preheat oven to 375 degrees. Using a large, sharp knife, trim ends; halve squash crosswise to separate bulb from neck. Peel with a vegetable peeler. Cut both pieces in half lengthwise. With a spoon, scoop out seeds; discard. Cut squash into 2-inch chunks; transfer to a small rimmed baking sheet. 

2. Roughly chop shallots and add to pan along with garlic, toss with oil and sage; season generously with salt. Roast until squash is very tender, about 45 minutes, tossing once halfway through. 

3. Transfer vegetables to a food processor; puree. With motor running, add half and half through the feed tube; process until smooth. Add chicken stock; continue to process until totally smooth. Season again with salt if necessary. (If sauce seems to thick it can be thinned with a little pasta water.)

4. Cook pasta according to package instructions. Pour sauce over pasta; toss to coat. Serve with desired toppings.

*NOTE: Fresh rosemary or sage can be simmered in half and half for additional flavor.

Sup.

Betcha your surprised to hear from me after all this time. Yeah, sorry about that but you know how it goes. This space, and my obvious neglect of it, has been on my mind for sometime. A friend recently said “Hey what’s up with beets and blue cheese?” Turns out that was the push I needed to quit thinking about writing and simply start typing. So here I am.

A ton has happened since my last post, not the least of which is; I moved to a new town (in a completely unfamiliar corner of the state). I bought a new house (which is equal parts diy’er dream and nightmare). And I have new social circles to learn to navigate. (Finding your people in an unfamiliar place feels a little like dating, but without the romantic butterflies.) When things get tricky and I can’t figure out who to ask about rec softball verses the Summer club league (I blew it with girls basketball signups, it wasn’t pretty) or I’m feeling overwhelmed surveying my soggy and overgrown woodsy yard, I try to remind myself that “Great things never came from comfort zones.” And then I make a cocktail and move on.

I still cook as much as ever (we recently put in a sweet new kitchen), but I think this go ’round beets and blue cheese might be more rambling lifestyle blog and less recipe driven. A little diy project post here, a smattering of cooking and some old school gardening there. Whatever I’m currently working on you’ll get to hear about, lucky you! Speaking of gardening… I’m a passionate dig in the dirt/wanna be farmer. In fact when we moved to our woodsy corner of the world my hope was to get a few chickens, my dream was to get a few goats. It turns out that this is one dream that may simply never be fulfilled, however I’m coming to terms with this reality. The fact that the local feed store has sweet little peeps that I can go visit certainly helps. I literally go in, squat down next to the giant trough of peeps with their heat lamps and bed of shaving, and I just gaze. The shop dudes think I’m insane, but theres no shame in getting a chick fix. ALSO (this is even more exciting to me than the chicks) I was just hired by a local farm as a part of their workshare team. I’ll work on a real deal farm a few hours a week, planting, tending and harvesting, and be paid back in glorious organic veggies. This is literally my dream job!

So there you have it, my plan for the rebirth of beets and blue cheese. I make no promises about frequency or engaging content, but I’ll do my best. Pinky swear.

You’re So F#*king Saucy.

Between kid activities, endless school half days and work kicking into high gear, the last thing on my wish list is holiday menu planning. Yet here we are once again. And while I would love nothing more than skipping the bird for one year and serving poached salmon or a simple risotto, the mere suggestion seems to send everyone into a tizzy. Traditionalists, each and every one of them! And so I give in and plan the Thanksgiving meal they all so desire, but the rebel in me can’t go quietly into the night. Not me, not ever. So how do I show my resistance? Prove that I might be swayed but not strong-armed? With cranberry sauce.

I make cranberry sauce each year that gets rave reviews, but this year I’ve decided to tweak that age old recipe up a bit. Kinda a lame act of rebellion I know, but work with me here… I swapped out the granulated sugar for brown, added Five Spice Powder, lime juice and a healthy dose of fresh ginger. The results were delicious, but then quiet conquest always is. Will they notice? Probably not. They’ll say it’s good, they’ll clean their plates, and perhaps they’ll even ask if there are any leftovers the following day, but that’s where it will end. They’ll be none the wiser to the belligerent act of mutiny they just devoured, and that’s fine by me. I will sit back and quietly savor my resistance.

Cranberry Sauce
This recipe is so easy and so delicious you won’t believe you ever considered dinner complete without it.

cran.sauce3

1 12 oz. bag fresh cranberries
1/2 cup brown sugar
1/2 cup orange juice
juice of 1 lime
1/8 tsp. ground Five Spice Powder
zest of 1 lg. orange

  1. Add the first 5 ingredients to a small saucepan. Cover and cook over medium heat, stirring frequently, until the berries begin to soften.
  2. Increase the heat, bring to a simmer and cook uncovered 2-3 minutes longer until the sauce begins to thicken and nearly all of the berries have popped.
  3. Allow to cool slightly in the pan before adding the orange zest to the sauce. Transfer to a glass jar and store in the refrigerator until ready to use.

kale for the win

Today is National Kale Day, HOORAY! Kale is without a doubt the green of the moment. You can’t swing a vegan around Whole Foods without hitting a kale display. Seriously, google “kale recipe” and you’ll be astonished at the array that comes up; soups, salads, smoothies, baked, broiled and braised. And why all this leafy green glorification? Well, because kale is a super food of course! As a lover of all things veggie I can’t help but be excited about this superstar green having a day all to itself. I also see it as my civic duty to encourage others to give green a chance, and I take that duty quite seriously. So seriously that… I have a secret. Wanna hear it? I’ve been formulating a plan to switch my family to a plant based diet after the holidays. It will be a test of sorts, not so much for me but for them. I will keep my test relegated to a week, after all my goal is to change thinking not torture souls, and I will allow all forms of dairy. I’d just like to prove to my pack of carnivores that one can in fact live well on a diet of veggies. Wish me luck!

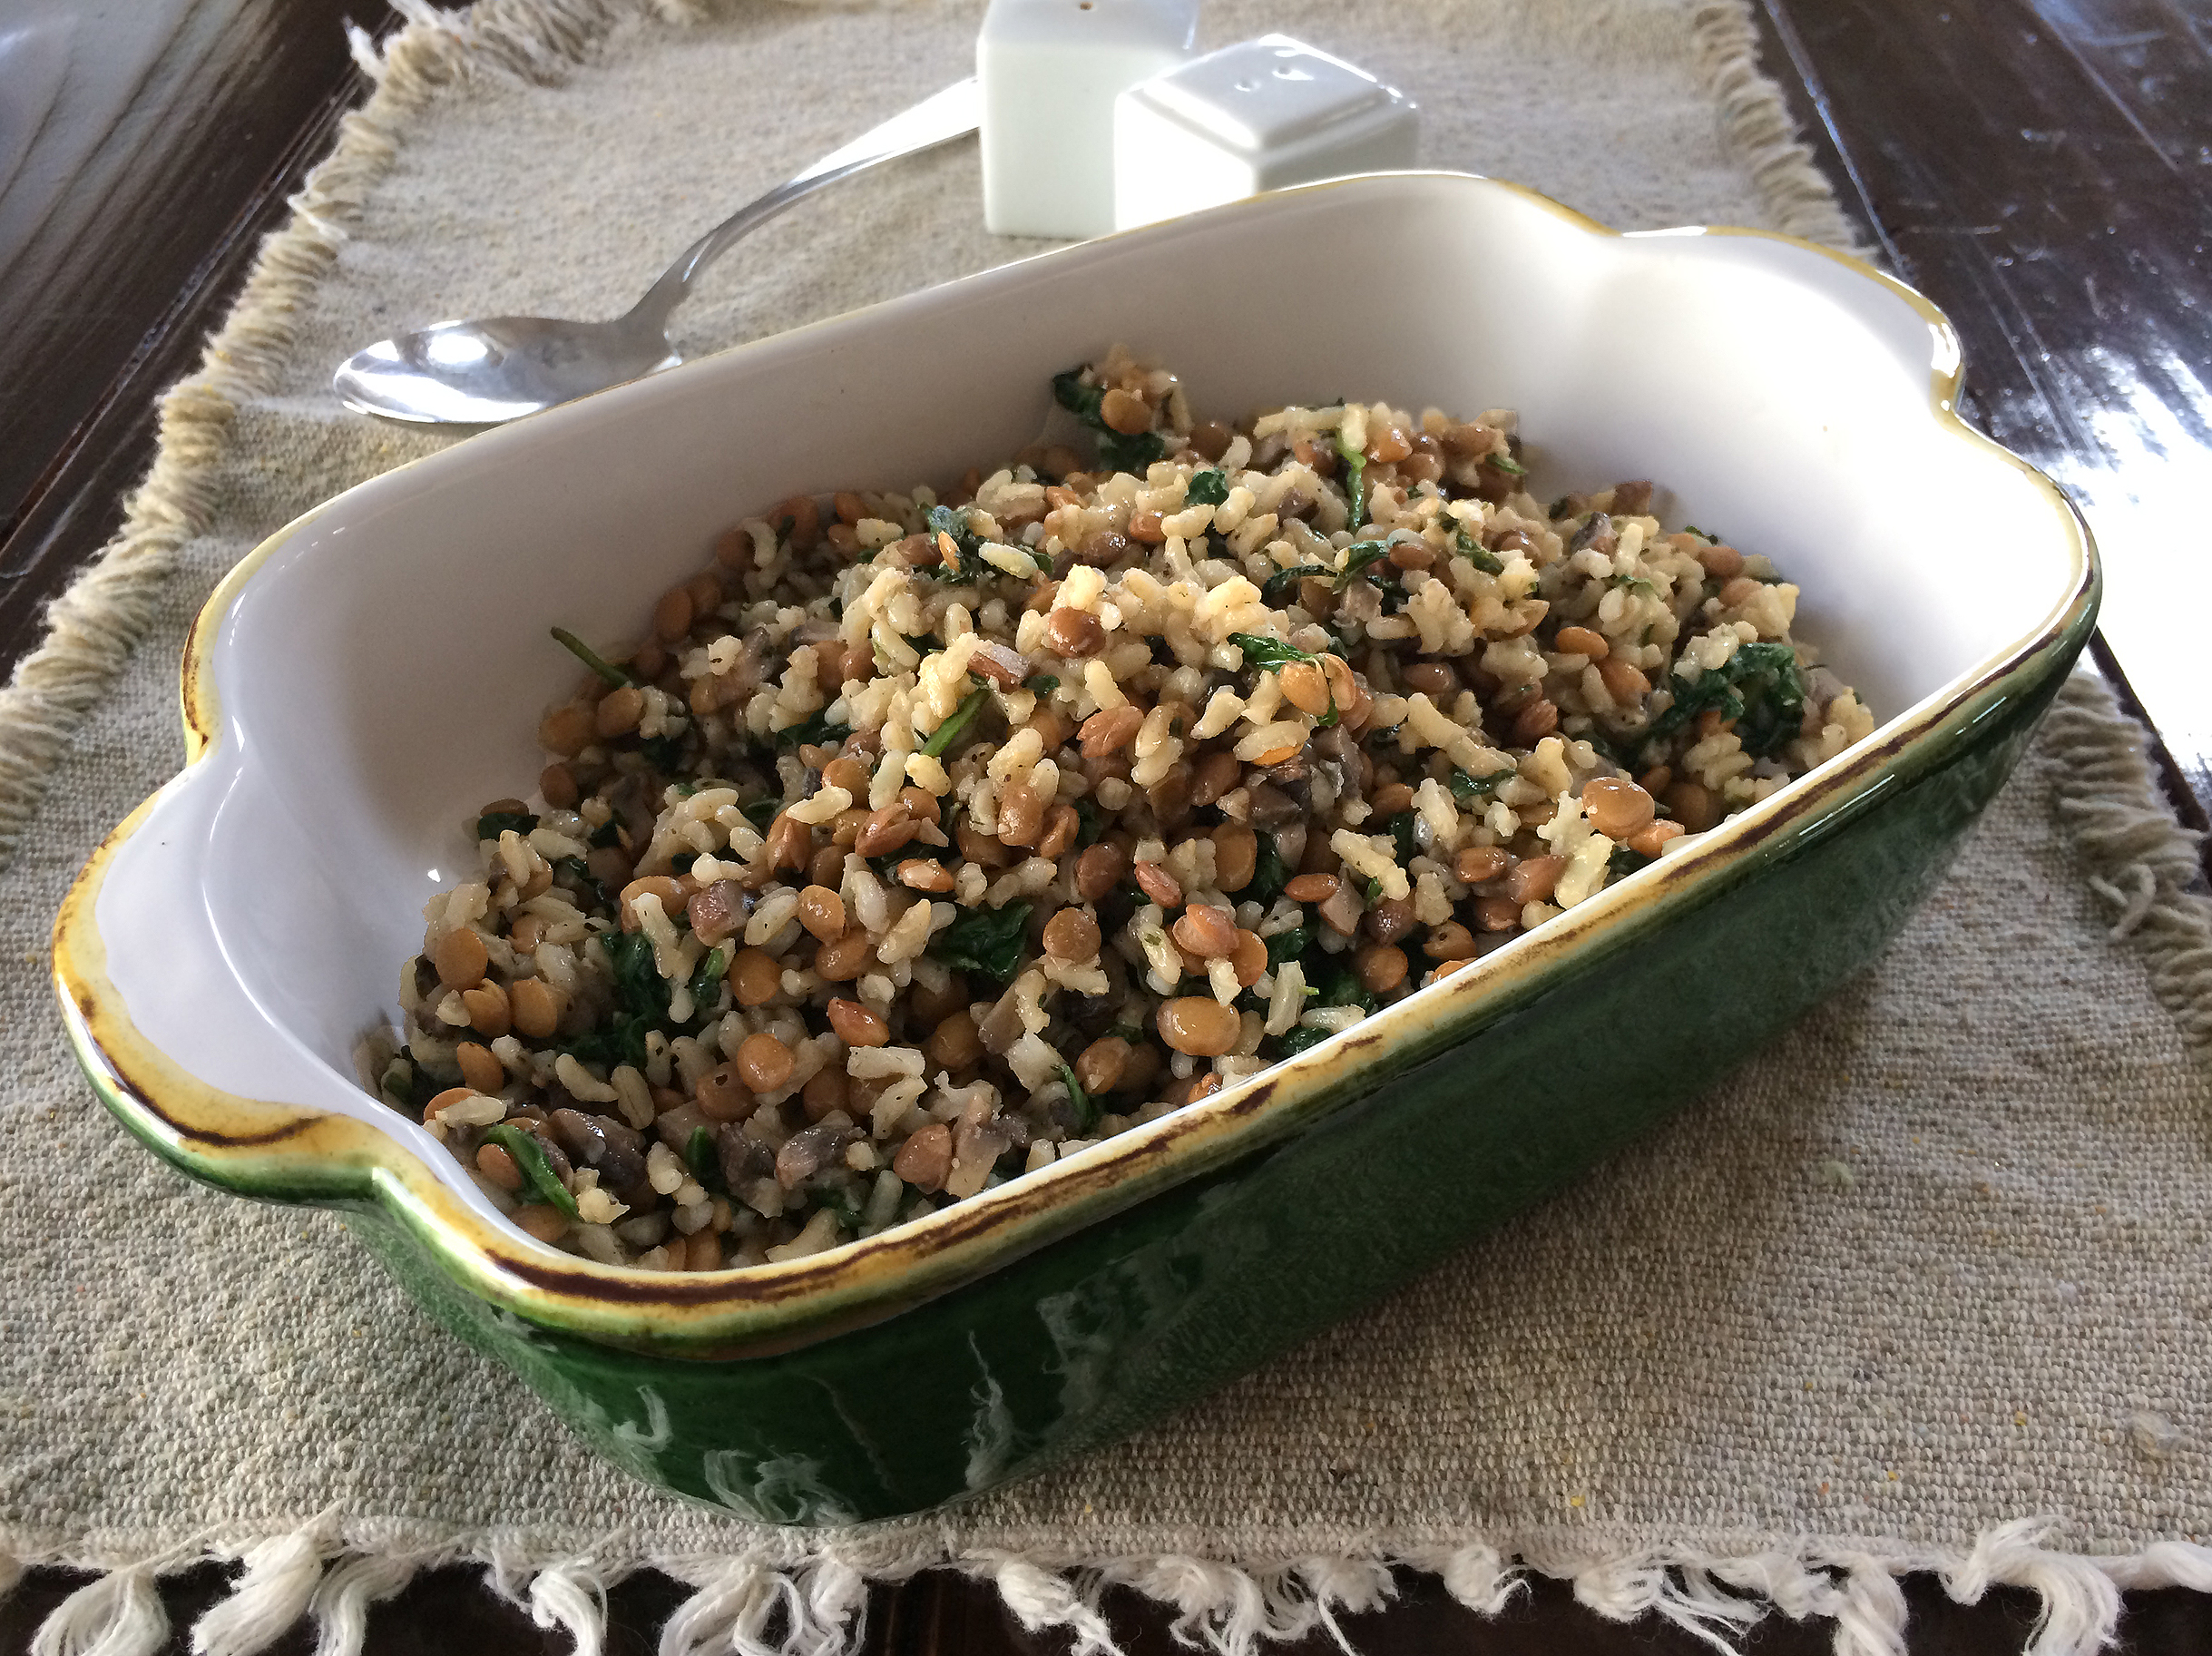
This plotting and planning has me thinking a lot about what constitutes a well-regarded meal in my house, and how to play off that idea. It seems to me the key lies in a meal that tastes fabulous (duh) and is filling in a truly satisfying kind of way. I’ve been wracking my brain and I’ve come up with a few dinner possibilities that I believe will be winners including risotto, eggplant parm and a cauliflower and corn chowder (stop making that face, its delicious) but I would need more than that to make my test week a success. It turns out I already have that recipe in my arsenal; a side dish that I always thought had the potential for greatness but had simply never been given the chance. A plan slowly formed in my head [que evil laughter]. Intrigued? Ready for the reveal? Okay here goes, the dish that will make all things possible is… Lentils with Brown Rice, Sautéed Mushrooms + Kale. What you’re not impressed? Well you should be. This combination is really and truly delicious together and it’s super easy to make, especially if you use canned lentils and instant brown rice. So what if I took this simple side dish and used it to stuff peppers, potatoes or squash. Deliciousness that what! High in protein and fiber, low in fat and cholesterol, deliciousness. Are you starting to see things from my perspective? Yeah, I thought you would. And who knows, with the right love and support lentils and brown rice could legitimately be the one thing that changes the Greco family’s lives FOREVER.

Yeah I know, it’s unlikely. But a girl can dare to dream.

Lentils with Brown Rice, Mushrooms + Kale
This can totally be served as side dish or used for stuffing. Whatever floats your boat.

rice+lentils

3 tbsp. olive oil
1/2 medium onion, finely diced
4 cloves garlic, minced
8 oz. baby bella mushrooms, diced
1 tbsp. fresh thyme leaves, minced
1 1/2 tsp. kosher salt
1/2 tsp. black pepper
2 handfuls baby kale, roughly chopped
2 cups cooked brown rice
1 can lentils, rinsed and drained

  1. In a large skillet warm the oil until shimmering. Add the onions and sauté until nearly translucent. Then add the garlic, mushroom, thyme, salt and pepper and let cook for 8-10 minutes or until the mushroom have released all their moisture.
  2. Add to the skillet two handfuls of roughly chopped baby kale and stir well. Then add the cooked rice and lentils and allow to cook until everything is heated through and the kale has wilted.
  3. Serve as a side or use as stuffing in baked potatoes, peppers or acorn squash.

gluten-free donuts that won’t make you barf

Well hello. That’s right, I’m baaack— We’ll technically I’ve never been gone, just busy. But I’m here now and ready to dish (pun intended).

A while ago I talked about going gluten-free. I’ve continued to vacillate over gluten, frequently debating with myself whether it makes a difference in how I feel day-to-day, and never really coming to a conclusion. Then my daughter started suffering from frequent stomachaches. However since it was the year of the debilitating stomach-flu and she does have a propensity to worry, I kept thinking perhaps those were the culprits behind the complaints. But then she threw up in school. After eating snack. And a classmate slipped in it. (Yeah, disgusting. He cried, she didn’t.) That’s when the clouds parted and the pieces fell into place, each time she ate food with gluten she got a stomachache. Sometime a little gassy ache and sometime a big barfy ache, but an ache nonetheless. I did a little gluten elimination experiment, and she felt great. I concluded my experiment with a celebratory grilled cheese on regular bread and guess what. Bellyache. She is now officially a gluten-free girl.

It’s pretty easy these days to find tasty and inexpensive gluten-free options at the store and more and more packaging is including “Gluten-Free!” on the label, making it all the easier to shop. But I have to say that when it comes to breads and baked goods the options are a bit bleak. I was recently gifted a andwich bread and bagel recipe from a co-worker whose daughter is celiac (I’ll share them after I make the recipes a few times) but I was on a mission to find a recipe for something that seemed indulgent and treat worthy. Hello donuts!

Since I’d already conquered Chocolate-Beet Donuts and Baked Cinnamon Spice Donuts I thought revisiting those recipes was a good place to start. While chocolate is always a fan favorite the extra moisture from the beets, coupled with the nontraditional flour, made recipe conversion tricky. The spiced donuts however were begging for a re-do, and so I re-did. Behold… The best homemade baked gluten-free donuts guaranteed NOT to make you barf. You’re welcome.

Gluten-free Cinnamon Spice Donuts
These are the best donuts. Seriously. Gluten and guilt free deliciousness in one good to go package.
glutenfree donut2

1 cup flax meal
1 cup rice flour
2 tsp. baking powder
1 tsp. baking soda
1/8 tsp. salt
1/4 tsp ground cloves
1/4 tsp. nutmeg
1 tsp cinnamon
1/2 cup granulated sugar
1/4 cup coconut oil, melted
1/2 cup + 2 tbsp. whole milk buttermilk, room temperature
4 eggs, beaten
1/2 tsp. Angostura bitters

sugar coating:
3 tbsp. coconut oil, melted
2/3 cup granulated sugar
1 1/2 tsp. cinnamon
1/4 tsp. ground cloves
1/4 tsp. nutmeg

  1. Preheat the oven to 375°F. In a medium bowl whisk together all of the dry ingredients. Place the coconut oil in a large bowl and pop in the microwave for a minute to melt. Add to the coconut the buttermilk and eggs and beat, then add the bitters and whisk to combine.
  2. Gradually add the wet ingredients to the dry and stir until just until combined.
    Grease or spray the doughnut pan and fill each doughnut form half way. (I find it’s easiest to pour the batter into a ziplock bag, snip off one corner and pipe it into the pan.)
  3. Bake for 8-10 minutes. (You’ll know they’re done when they spring back when touched and are just beginning to brown on top.)
  4. While the donuts are baking mix together the cinnamon-sugar coating in a medium bowl and melt the coconut oil. Set aside.
  5. When the donuts are finished baking, immediately remove them from the oven and brush them with coconut oil. Give them a quick roll in the cinnamon-sugar coating and enjoy!

plant smiles. grow laughter. harvest love.

It’s already May, isn’t that stunning? I feel as if only yesterday I was rooting through the kids Halloween candy looking for the Jr. Mints, but then it has been a crazier than usual year so it’s no surprise its a blur. Let me fill you in on what I’ve been up to the past few months: Last September, as the kids started a new school year I began my crusade to build vegetable gardens at their school.  I walked into my first meeting with the principal with an idea, a passion for gardening and the confidence that my diy pro of a husband could help me execute whatever plan I came up with. Eight (somewhat tedious) months later that idea has become a reality and yours truly is now the proud chairperson behind the ‘Oak View Elementary Garden’ (O*VEG for short).

Our school garden is a true labor of love, for me and everyone else involved. Countless hours have been spent planning, researching and jumping through flaming hoops to get to where we are today. Thankfully I wasn’t alone in my belief that a school gardens matter. Once word went out that approval to build had finally been given, the volunteers started pouring in and what a marvelous and irreplaceable group they proved to be! The physical garden was built in the rain (and only after multiple weather delays including a Spring snowstorm) by a group of remarkably dedicated parents and children. Hauling gravel, dumping loads of soil, installing beds and fencing and painting sheets of plywood beneath the protection of tents. All the while smiling, laughing and filled with good cheer despite the crummy conditions. I was knocked out by the sheer number of parents willing to give up their weekend to help turn an ugly expanse of blacktop into an oasis of growth. A group who believed in the power of possibility and who knew their efforts mattered. Mother Nature however had other ideas. The very same night as our garden build storms blew through the area; uprooting trees, downing power lines and blowing apart our fencing. I won’t lie, it was heartbreaking but it didn’t diminish our spirits for long. Back to the drawing board, back to work and before long… back to a lovely garden.

We had our ribbon cutting ceremony on April 22nd— Earth Day. Four hundred students circled the garden cheering as the gate was officially opened. Then a student representative from each of the six grades as well as special ed helped us plant the first vegetables of the garden. Back in the early Spring we had kicked off our garden adventure with a little seed starting with kindergarten and first grades. They scooped dirt, read direction sheets and planted seeds like the future urban farmers they all are. Beginning next week each classroom will be transplanting their seedlings into the garden, and then the real work will begin!

The other O*VEG’ers and I understand that there is only so much time in the day and that curriculums are already quite full. To insure that the kids have every opportunity to experience and enjoy the garden, a parent committee has been working to develop an extra curricular program for interested students. First on our list is an afternoon spent learning about earthworms, their importance in a garden and (hopefully) even setting up our own vermicomposting bin. We’d like to purchase night crawlers that can be added to our beds, allowing the kids (some of whom have never held a worm) the opportunity to touch one of natures ultimate aerators before it’s sent off to work. Another afternoon the students will be invited to visit my garden and meet the beekeeper who maintains my two honey bee hives. We will discuss the importance of pollinators and why we need to protect them. Our hope is that this school garden will create a learning opportunity for our children outside of the constraints of the classroom. The plan is to donate any food harvested from the garden to a local soup kitchen, thus also helping our children to gain an understanding of the value of volunteerism. Education, environmental stewardship, and a deeper connection to nature and the world at large is what we hope the garden will be able to offer to our school community. Oh and a few Jersey tomatoes of course! 

So you see I may have been absent from my blog, but certainly not from my life. I’m tired, but here’s the thing… It’s an extraordinarily exciting time to be at Oak View for both the students and parents. It’s been inspiring to witness the enthusiasm and sense of community the garden has already generated throughout the school. A community I can only imagine will continue to grow and thrive as the plants themselves do. Seeing the kids visiting the garden, checking out the few plants that have already been planted and considering the space their own, makes my heart smile. And that my friend, makes all the effort worth it.

1
2

eat like an inca

If you know me then you know I’m a restless spirit; I would much rather jump into the unknown then live in the routine. This adventurous streak probably explains my love of travel and my current obsession with the tv show Expedition Unknown. Some episodes make me think things like: “Hmm. Honduras definitely does not look like my cup of tea (or rice and beans as the case may be).” While others actually make me consider enduring the twenty plus hour flight to see the ancient temples of Thailand. I love watching them investigate age old myths and legends in far flung places. A recent episode all about the ancient Inca Trail, with a detour to the ruins of Machu Picchu, really hit home with me. Visiting Machu Picchu has long been on my list of someday adventures. I mean c’mon, have you seen pictures of the amazing stone ruins smack in the middle of the Peruvian mountain forest? How could you NOT want to go and see them for yourself?!? It must be a truly amazing, and perhaps almost life altering experience. (And husband of mine if you’re reading this, don’t be surprised when I say “I’ve been watching flights to Peru and…” Okay so I watched the episode, made notes (not kidding) about airports to fly into and altitudes to adjust to and went to bed. The next morning while standing in the kitchen drinking coffee I spotted a piece of paper sticking out from behind one of my cookbooks. As I went to shuffle it back into the pile the bold letters at the top of the page caught my eye: “Chili-Lime Inca Corn” Seriously? Incas last night. Incas this morning. I think someone is trying to tell me something.

This seemingly mystical connection just happened to take place on the first warm weekend of the year. Since I was looking for any excuse to be outside enjoying the sunshine and hoping “this is finally it for Winter” I decided it was time to break out the cast iron pan, fire up the grill and make a little Inca corn. So how’d it turn out? Well, I have but one thing to say: The demise of the Inca Empire clearly had nothing to do with their choice in food. These little fried corn kernels are pure gold.

Inca gold.

Homemade Chili-Lime Inca Corn
These are totally addictive. Be prepared.

Inca Corn2

15 oz dried giant corn/Maiz Mote
Canola/Olive oil blend
1 tsp chipotle chili powder
zest and juice of 1 lime
1 1/2 tsp fine pink salt
1 tsp smoked paprika
  1. Place the dried corn in a pan with a lid, cover with water and allow to sit for 7-12 hours.
  2. Drain corn, shaking as much water off as possible and spread out on a clean tea towel. Allow to dry for an hour or so minutes. (It doesn’t need to be bone dry, you just don’t want much water on the surface as you’ll be dropping it into hot oil.)
  3. While the corn is drying make your spice mixture. Mix together the chili powder, lime zest, pink salt and smoked paprika. Transfer the spice mixture to a doubled paper lunch bag and set aside.
  4. Line a rimmed sheet pan with paper towels for draining the fried corn.
  5. In a cast iron pan or high sided skillet heat 1/4 inch of oil to 375º F. Working in batches add the corn to the oil and fry until the it’s a toasted golden brown, stirring frequently. Use spider or slotted spoon to remove the corn from the oil and transfer it to the paper towel lined sheet pan. Continue with the remaining corn.
  6. When all the corn is fried squeeze the juice from your tested lime all over it. Carefully transfer the corn to the lunch bag containing the spices and shake well to coat. The corn will become cruncher as it sits and will keep for several days (if it lasts that long).

*adapted from the kitchn

soul satisfying shrimp risotto

Stirring. Surveying.
Slow.
Starch. Stock. Shrimp.
Self Restraint.
Supper.
Soul Satisfying.

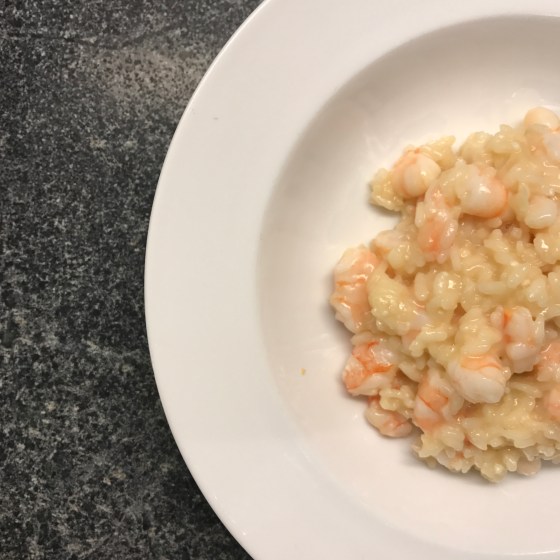
Risotto, that sublime Italian rice dish with a reputation for being incredibly time consuming and fussy. In reality it’s really pretty simple to pull together. Hot broth in one pot, toasted arborio rice in another. A wooden spoon, a bit of butter and cheese. A smidgen of patience and buon appetito!… Risotto like you thought you could only get in a restaurant. Yes the spoon has to be wooden (so as to not damage the grains of rice). Yes the broth has to be warm (it’s more easily absorbed than cold stock). Yes you need to stir the rice almost constantly and it needs to be served IMMEDIATELY or it becomes dense and gluey. But that’s a small price to pay for a creamy, rich and luxurious dish of perfect risotto.

In the words of chef Jamie Oliver “Risotto… It takes a bit of time and a bit of love. In life, you can’t have everything in one basket.”

Simple Shrimp Risotto
You can get fancy and add asparagus or sweet peas to this risotto, but it’s perfectly perfect without it as well. Abbondanza!

3 cups shrimp* or chicken stock
2 tbsp. extra virgin olive oil
1 large onion, finely diced
1/8 tsp. salt
1 cup Arborio rice
1/2 cup white wine
1 lb. small shrimp, shelled and deveined
2 tbsp. salted butter
1/4 cup grated pecorino romano cheese
2 tbsp. heavy cream

  1. Place the stock in a tall sided pot and bring to a boil. Once boiling reduce to a low simmer to keep warm.
  2. In a large high sided pan with a heavy bottom, heat oil and sauté onions until nearly translucent, about 5 minutes. Sprinkle with salt, add the rice, stir to coat with oil and sauté with onions to toast each grain, another 5-6 minutes (stirring frequently).
  3. Once toasted slowly add the white wine, stirring gently with a wooden spoon. Once the rice has absorbed the wine, add 1 cup of warm stock and stir. Allow to cook until stock has been absorbed.
  4. Add a second cup of stock to the pan, stir gently and allow the rice to absorb the liquid and the pan to once agin become dry. Continue to stir frequently and add the third and final cup of stock to the pan, cook once more until dry.
  5. Roughly chop half of the shrimp. Add all of the shrimp to the risotto, stirring gently and cook until they are just pink, this will only take a few minutes.
  6. Remove the pan from the heat, add the butter, cheese and heavy cream. Gently stir to melt the butter and combine ingredients and serve immediately.

*To create shrimp stock I simply placed the shrimp shells and some water in a small saucepan and allow it to for for an hour or so. Strain the liquid and voilà— shrimp stock.

**adapted from the reluctant gourmet

mayonnaise musings

I think I need a muse. It appears that I’ve become so distracted by “my life” that when I’m actually able to carve out a little time for “my self” I’m at a loss. I need inspiration, a creative catalyst, a bit of meaningful illumination. Seriously, I think a muse is the answer. (And just for future reference, if you should one day decide to search ‘creative muse’ on Craigslist be prepared to be surprised.) Okay, so back to my slump… I’ve been trying to come up with an idea for a new post ever since my last one two months ago. It’s not that I haven’t been cooking, frankly the cooking is the easy part, it’s that I haven’t had the time to test, photograph and come up with a few snappy lines about the amazing thing I just made. So instead I’ve been pondering and considering, waiting for the ‘spirit of the whisk’ (not a real thing but it should be) to transcend upon me and simply biding my time until it does. After all you can’t rush transcendence.

I was standing in my kitchen the other morning drinking coffee and checking email when the strangest idea popped into my head: “I should really make mayonnaise.” That was it, nothing more. “Huh… Should I?” I thought to myself. I’ve made plenty of perfectly-good-as-store-bought-but-took-the-time-to-make-anyway condiments in the past (including Hollandaise the fancy cousin of mayo), so why not mayonnaise. Why not?

As it happens at the same time I was have my little egg and oil emulsification epiphany the NY Times was running a recipe for Classic Deviled Eggs written by the same co-author of the cookbook I based my mayonnaise recipe on; Sheila Lukins. Was my food processor a portal to the after life? Was Shelia trying to tell me to keep on truckin’? The answer remains unclear, but then you already know my stance on rushing the mystical, her mayonnaise however was a thing of ethereal beauty.

Simple Homemade Mayonnaise
You can totally adjust the tang of this mayo by playing with the amount of lemon juice you use.

mayonnaise

2 egg yolks
1 whole egg
1 tbsp. Dijon mustard
1/8 tsp. salt
pinch of black pepper
3 tbsp. lemon juice
1 1/4 cups vegetable oil

  1. Combine all the ingredients except for the oil in the bowl of a food processor and allow to run for 1 minute.
  2. With the motor still running slowly drizzle the oil through the feed tube, allowing the eggs and oil to emulsify. Scrape down the sides, pulse a few more times then transfer into a airtight container. Store in the refrigerator, it will keep for 5 days.

*adapted from the new basics cookbook


perfect pie crust

“I have a confession to make; I love pie but I never make my own crust. I know I should, I realize that it’s not really all that difficult and that homemade is far superior to store bought, but somehow I’ve just never gotten around to giving it a whirl. However I promise that one day soon I will make the effort. I promise…”

I wrote these words two years ago and I’m embarrassed to say that up until recently, they remained true. As much as I preach about homemade real food I honestly had NEVER made or even attempted to make pie crust from scratch. Why? Good question and one I actually don’t have an answer to. I guess I simply just wasn’t in the mood. However it would appear that the universe was fed up with my wishy-washy attitude towards pie crust and decided to force the issue. How you may wonder. With the perfect storm of gardening scenarios… The threat of an early frost and tomato plants that just wouldn’t quit.

You see my vegetable garden; My suburban oasis, the fulfillment of my wannabe farmer aspirations and my favorite place to putter around and avoid all the things I should be doing instead had one of its most successful seasons ever. Was it thanks to the bees? The fact that last years crop was so pitiful that I was due a bountiful year or was it simply good luck? I’m just not sure. What I do know is that this year was one of the most prolific years my little garden has ever had. So imagine my dismay when the overnight temps were predicted to drop well below freezing and my tomato plants were still loaded with unripe tomatoes. I did the only thing I could think to do, I picked the fruit and decided to figure out the rest later.

According to Martha Stewart green tomato pie is DELICIOUS and the perfect substitute for apple pie. In fact she claims that by using the same spices as you would in a traditional apple pie, you can actually fool your unsuspecting guests.

Martha was wrong. Very wrong.

My tomato pie was a giant soupy, undercooked and fairly disgusting looking mess. But… The crust (which I had spontaneously decided to make from scratch) was AMAZING! So good that I actually couldn’t bear to throw it out. Instead I poured the tomato gunk out, wrapped up what remained and we ate crust with vanilla ice cream for dessert the rest of the week. Funny right, but true nonetheless. I am now a from scratch crust devotee and a total crust snob who’s shameful Pillsbury purchasing days are well behind her.

“Candy might be sweet, but it’s a traveling carnival blowing through town. Pie is home. People always come home…” This has been one of my favorite quotes for some time, but my newfound crust appreciation makes me feel like I finally truly understand it.

Super Simple Food Processor Pie Crust
Sure cooks have been making delicious and flakey pie crust by hand for hundreds of years, but that doesn’t mean you have to. Have a little faith in technology.

1 1/2 sticks (12 tbsp.) cold salted butter
3 cups all-purpose flour
1 tablespoon sugar
1 teaspoon kosher salt
1/3 cup cold vegetable shortening, such as Crisco
1/2 cup ice water
  1. Cut the butter into cubes and return it to the refrigerator while you prepare the flour mixture. Place the flour, sugar and salt in the bowl of a food processor and pulse a few times to mix. In multiple batches add the butter and shortening, pulse in between additions until the butter is the size of peas. Continue to pulse and slowly pour the ice water down the feed tube until the dough begins to form a ball (you may not use all of the water.) Scoop out the dough and place on a sheet of plastic wrap. Gently shape into a ball, wrap and refrigerate for at least 30 minutes.
  2. The dough is now ready to be used. For a double pie crust cut the dough in half, roll out on a well-floured surface to the size of your pie pan and proceed as usual. For hand pies cut the dough in half, the halves into quarters and the quarters in half again. Roll out and using a pocket pie crimper (or a 6″ inverted bowl), cut out as many circles as possible. Re-roll the crust scraps and continue cutting out circles until you run out of dough. Fill with your choice of sweet or savory filling, bake and enjoy.*

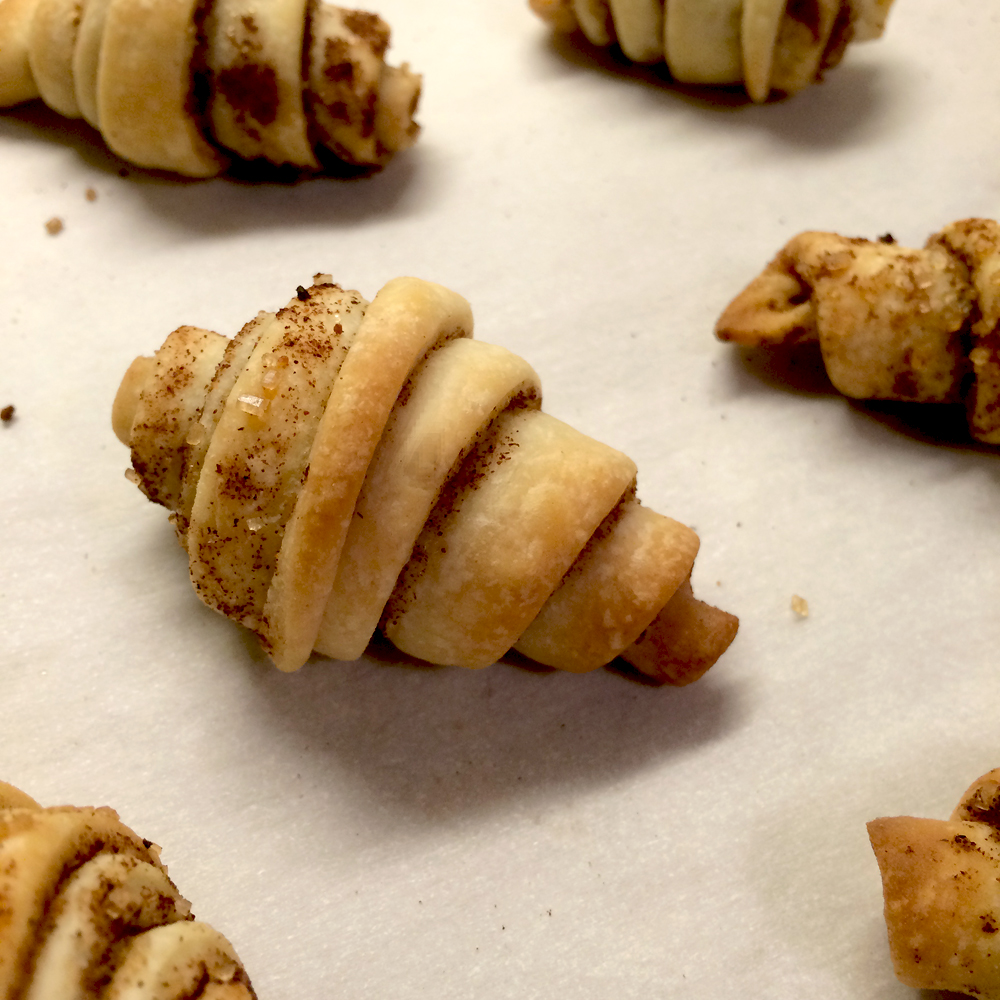
*One of my fondest childhood memories actually revolves around pie crust. My mother has always made hers from scratch and as any baker knows, there is always a bit of leftover dough when the pie is finished. She’d gather the scraps up and roll them back out. Dust them with cinnamon and sugar and slice them into triangular strips. Then she’d roll the strips up, pop them into the oven for a few minutes and voilà… tasty little Rugelach type cookies that to my way of thinking were even better than the pie itself.

pie crust cookies

have kids, will travel.

Once upon a time, long before children were part of the equation, my husband and I traveled. We worked hard and vacationed even harder; off to the Caribbean in the Spring, overseas in the Fall and nearly every Winter weekend spent skiing in Vermont. “I work to pay for my next vacation.” I would joke. We were young and unencumbered, determined to enjoy everything our carefree lives and big fat paychecks would allow. And enjoy it we did.

And then they arrived.

All sweet gummy smiles and tiny gurgley coos. Seemingly innocent babes, ready to take over every facet of our previously fancy free lives. And so began our adventure into parenthood and all the joys (and trials) that go along with it. And our passports sat. And our passports grew dusty. And eventually… our passports expired. But we never forgot those carefree adventures and we’ve regaled our kids with stories of our trips as soon as they had the attention span to listen. Wrapping up each story with the same phrase: “When you get older we’ll take you to…”, promising wholeheartedly to one day head off with them to some far off local. And we meant it when we said it, but for years it was just words. Until it wasn’t.

Doing anything with kids adds an additional layer of complexity, so when we decided that they (and we) were ready for a trip overseas it was not done so lightly or impulsively. I wanted them to fully experience everything traveling to an unfamiliar country has to offer; I wanted them to see sites that would inspire them, transform them, make them into broad-minded, open-eyed, free-thinking little people, but… I wanted to do so with as little stress as possible. While we never let the fact that we don’t speak Spanish, Italian, French or Dutch stop us from enjoying any of our past trips or dictate our destination, that was then and this is now. The idea of having to juggle kids while attempting to do a respectable job at translating seemed too daunting of a proposition. Nope, if we were going to make this trip happen it would have to be to an English speaking country. And honestly, once I made that decision it actually simplified matters. English speaking, in Europe with tons of awe inspiring cultural sights to see… London seemed to totally fit the bill.

I had been to London once before but it was on a whirl-wind trip with my mother years ago. We saw some sights, drank some tasty cocktails, ate some lovely dinners and came home. This trip however would require a bit more advanced planning. I knew I wanted to stay at a hotel that would give us enough space to get away from each other after a long and tiring day of sightseeing. We decided to stay was a residence hotel on the Thames, adjacent the the London Tower called The Cheval Three Quays. We booked a two bedroom, two bath, full kitchen and living room apartment with a washer and dryer, maid service and a concierge bar none. It was the perfect quiet oasis after a day out and about in the city. Now to focus on the sites we most wanted to see. Our list was long and believe it or not we saw almost everything on it, but what we loved beyond belief and suggest everyone visit was:

The London Science Museum (an AMAZING combination of design museum/ hands on science museum/Smithsonian museum with a fantastic restaurant to boot.) Right next door is the Natural History Museum, home to massive collections of botany, entomology, mineralogy, paleontology and zoology. Their dinosaur and fossil exhibits are like nothing I’ve ever seen before. Another must if you have a little person interested in experiencing a traditional British tea is the “Mad Hatters Tea” at the Sanderson Hotel. It was a fabulous “just the girls” afternoon for my daughter and I. Every detail of the meal was well thought out and delicious. From the jewelry box full of sugar cubes to the tiny bottles of “Drink Me” potion, the handmade chocolate teacups full of light as air mango mouse to the perfectly replicated miniature queen of hearts cards made out of white chocolate. And the tea sandwiches, scones and mini quiche were all perfectly perfect. Another not to be missed destination is Borough Market, a permanent (partially indoor/partially out green market) that will make any foodies eyes roll. To say the place is amazing wouldn’t even begin do it justice. Since we were in the home of Hogwarts we booked tickets for the Harry Potter Studio Tour and got to see up close the actual sets, props and costumes from the eight movies. Even from a non-Potter aficionado’s point of view it was pretty incredible tour. (A word of advice; book these tickets months early. Entrance is timed, a limited number of visitors are allowed in and they sell out fast.) We went to see Charlie and the Chocolate Factory in The West End and honestly, it was one of the best musicals I’ve ever seen. Who cares if you have Broadway right around the corner, seeing a show in The West End is a vastly different experience than one in NYC and absolutely worth the expense. We took a ferry out to Greenwich to see where time keeping as we know it began. The village was lovely with lots of shops and restaurants lining quaint winding streets, and Greenwich park is beautiful with a fantastic playground. Here’s a tip: While the hike up to the observatory will reward you with fabulous views of the city, you can actually see (and straddle) the famous Meridian Line just outside the entrance to the park. The National Maritime Museum, with the Cutty Sark at permanent anchor nearby is also a must see for anyone interested in nautical history. Another thing you must do; walk over the Tower Bridge at least twice, once in the daylight and once at night. (I’ve live in the NYC area for more than 25 years and I’ve never walked over the Brooklyn Bridge, yet we walked back and forth over the Tower Bridge at least a dozen times over the course of the week.) And speaking of walking, we walked nearly everywhere and saw sites we would have missed taking the tube. One day we wandered around our hotel neighborhood just to see what was close by and discovered not only the remains of a former Roman Wall dating from 200 A.D. but also All Hallows by The Tower; the oldest church in London. The building, with its scorched stone walls and puddles of melted lead, barely survived WWII bombings and has the scars to prove it. It also had super cool catacombs below with tons of historic artifacts. My son is a budding WWII history buff so he and my husband spent one afternoon touring the HMS Belfast and the Imperial War Museum. They both loved and were moved by the exhibits as well as the stories of heroism and courage. I could go on more about where we went and what we did, but instead I’ll a quick rundown of some of the fantastic meals we ate:

We had some amazing Indian food and sushi, crazy delicious fish and chips and a steak and ale pie to make your eyes roll. The kids discovered that malted vinegar really is the perfect condiment for fries, they were introduced to foie gras and LOVED IT (I have the giant dinner bill to prove it) and they were seriously delighted by the fact that Kinder Surprise Eggs were available everywhere. But the one meal we were all the most bowled over by, the one meal that we actually asked the server to ask the kitchen what their secret was, the one meal that my son declared in need of replicating at home was actually the simplest; Beef Burgers with Caramelized Onions and Blue Cheese. Sounds delicious right it? It was the onions that made it. Not only were they caramelized, they were caramelized with balsamic vinegar and brown sugar and they were outrageous.

So now were home… and while I still haven’t found the time to download or print all of our pictures, or put our tickets and receipts in my memory shadowbox, I have found the time to try and replicate those onions. Mine were nearly as good as in London, and if I closed my eyes and really focussed I could almost hear Big Ben.

God Save The Queen.

london fam

Balsamic-Brown Sugar Caramelized Onions
These are a delicious addition to just about anything..

2 large sweet onions, halved and sliced thin
3 tbsp. olive oil
2 tsp. salt
3 tbsp. brown sugar
1/3 cup balsamic vinegar

  1. Heat the oil in a large sauté pan. Add the onions and salt, give a stir to coat with oil and allow to cook over a low flame until they just begin to color, stirring frequently.
  2. Add the brown sugar and stir to combine. Add the balsamic vinegar and let cook, stirring frequently, for about 40-45 minutes, or until the onions have cooked down and the liquid has turned into a thick syrup.