pickles in the rainforest

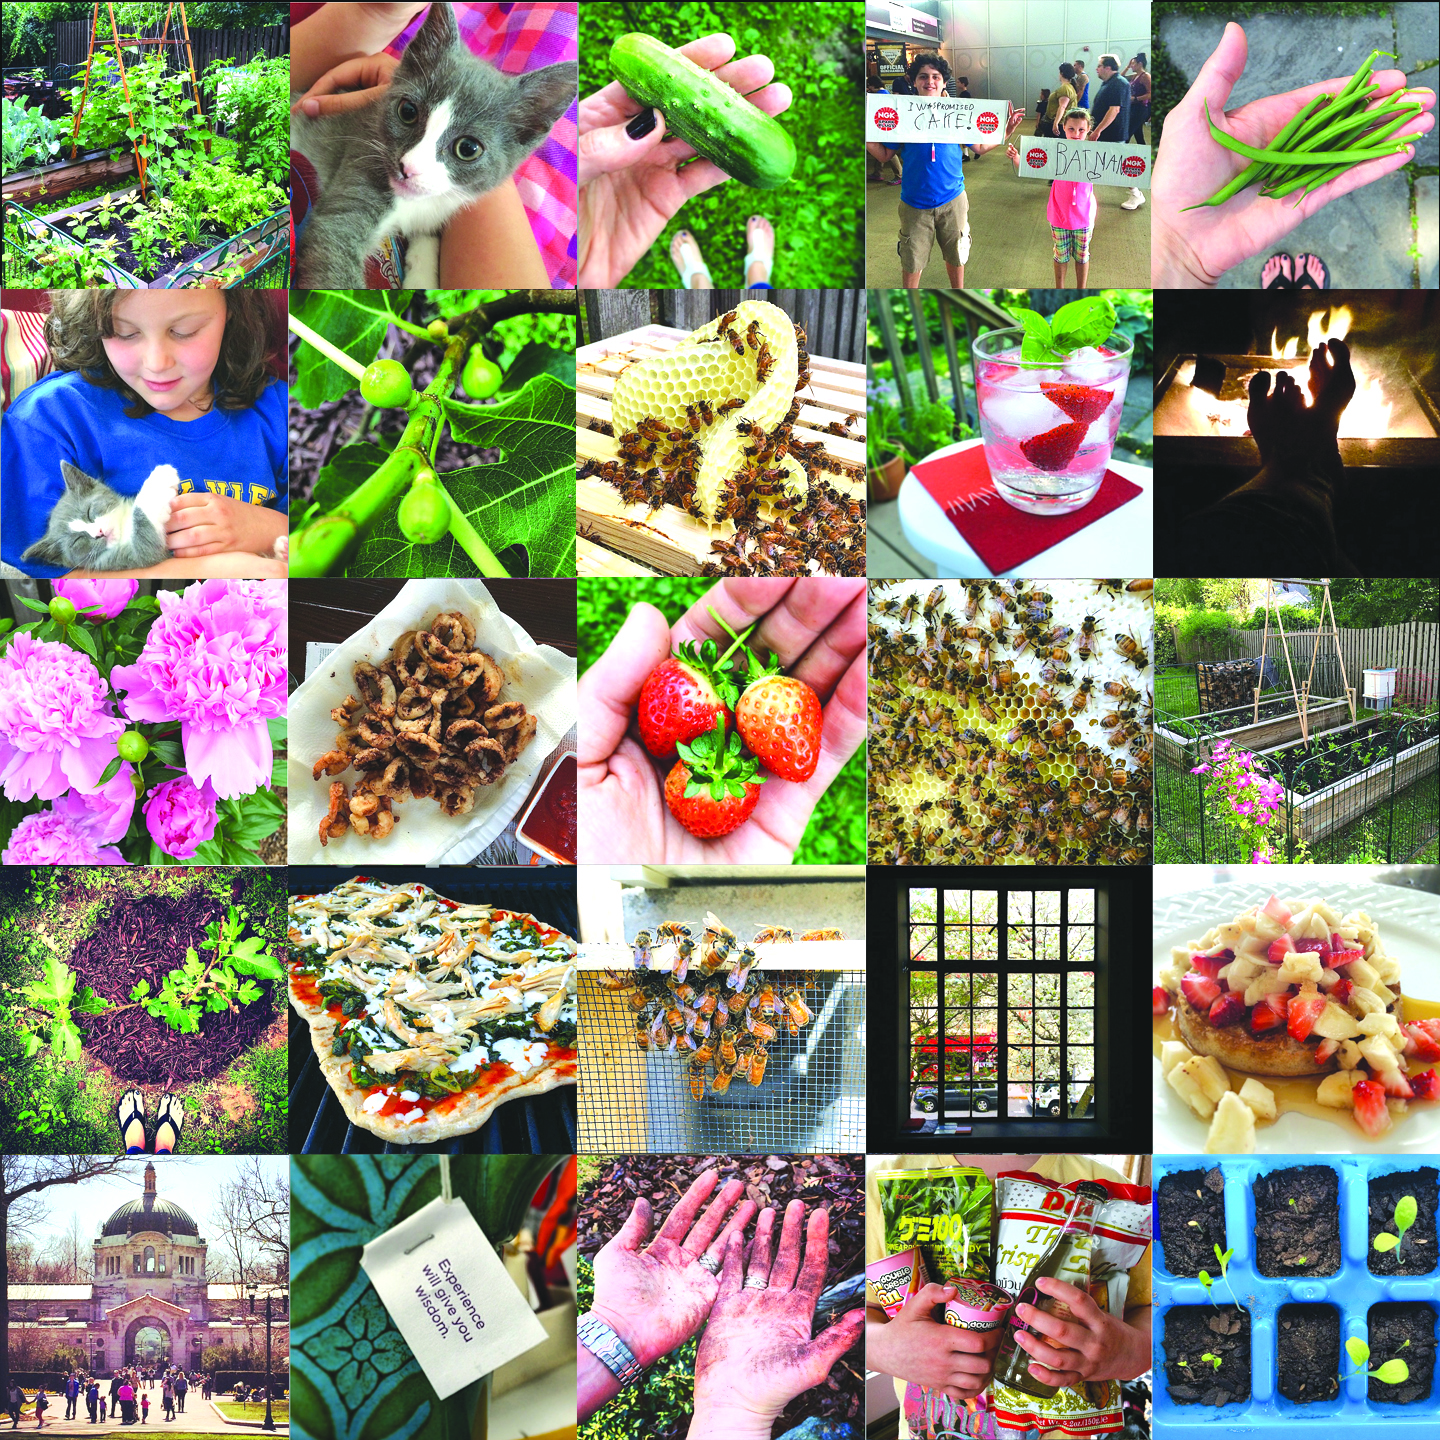
There are a few things in this world that I just can’t cope with; tops on the list being bugs. I’m not proud of this and I try to be brave when faced with one needing “relocation” but really… Blech! Glack! Eeek! (with a shiver thrown in for good measure.) However I’ve come to realize that for me location totally factors into my bravery quotient. When I discover a GIANT spider among the cucumber plants, only after I’m elbow deep attempting to harvest what’s ripe, I’m totally calm, cool and collected. Yet if the same spider should happen to show up in the house (or god forbid in my car), I come completely unglued. Sad, yet true. But here’s my theory: The universe places obstacles in your path as an opportunity for growth. It’s then up to you to deal with and overcome the obstacle or to allow it dictate the journey. And since I’m the kinda girl who prefers to be the captain of her own ship, I’ll be damned if I let a spider or two determine my path. (Not to mention what if one day the opportunity for an all-expenses paid trip to the Amazon rainforest should come along. I need to be prepared to laugh in the face of creepy, crawly things!)

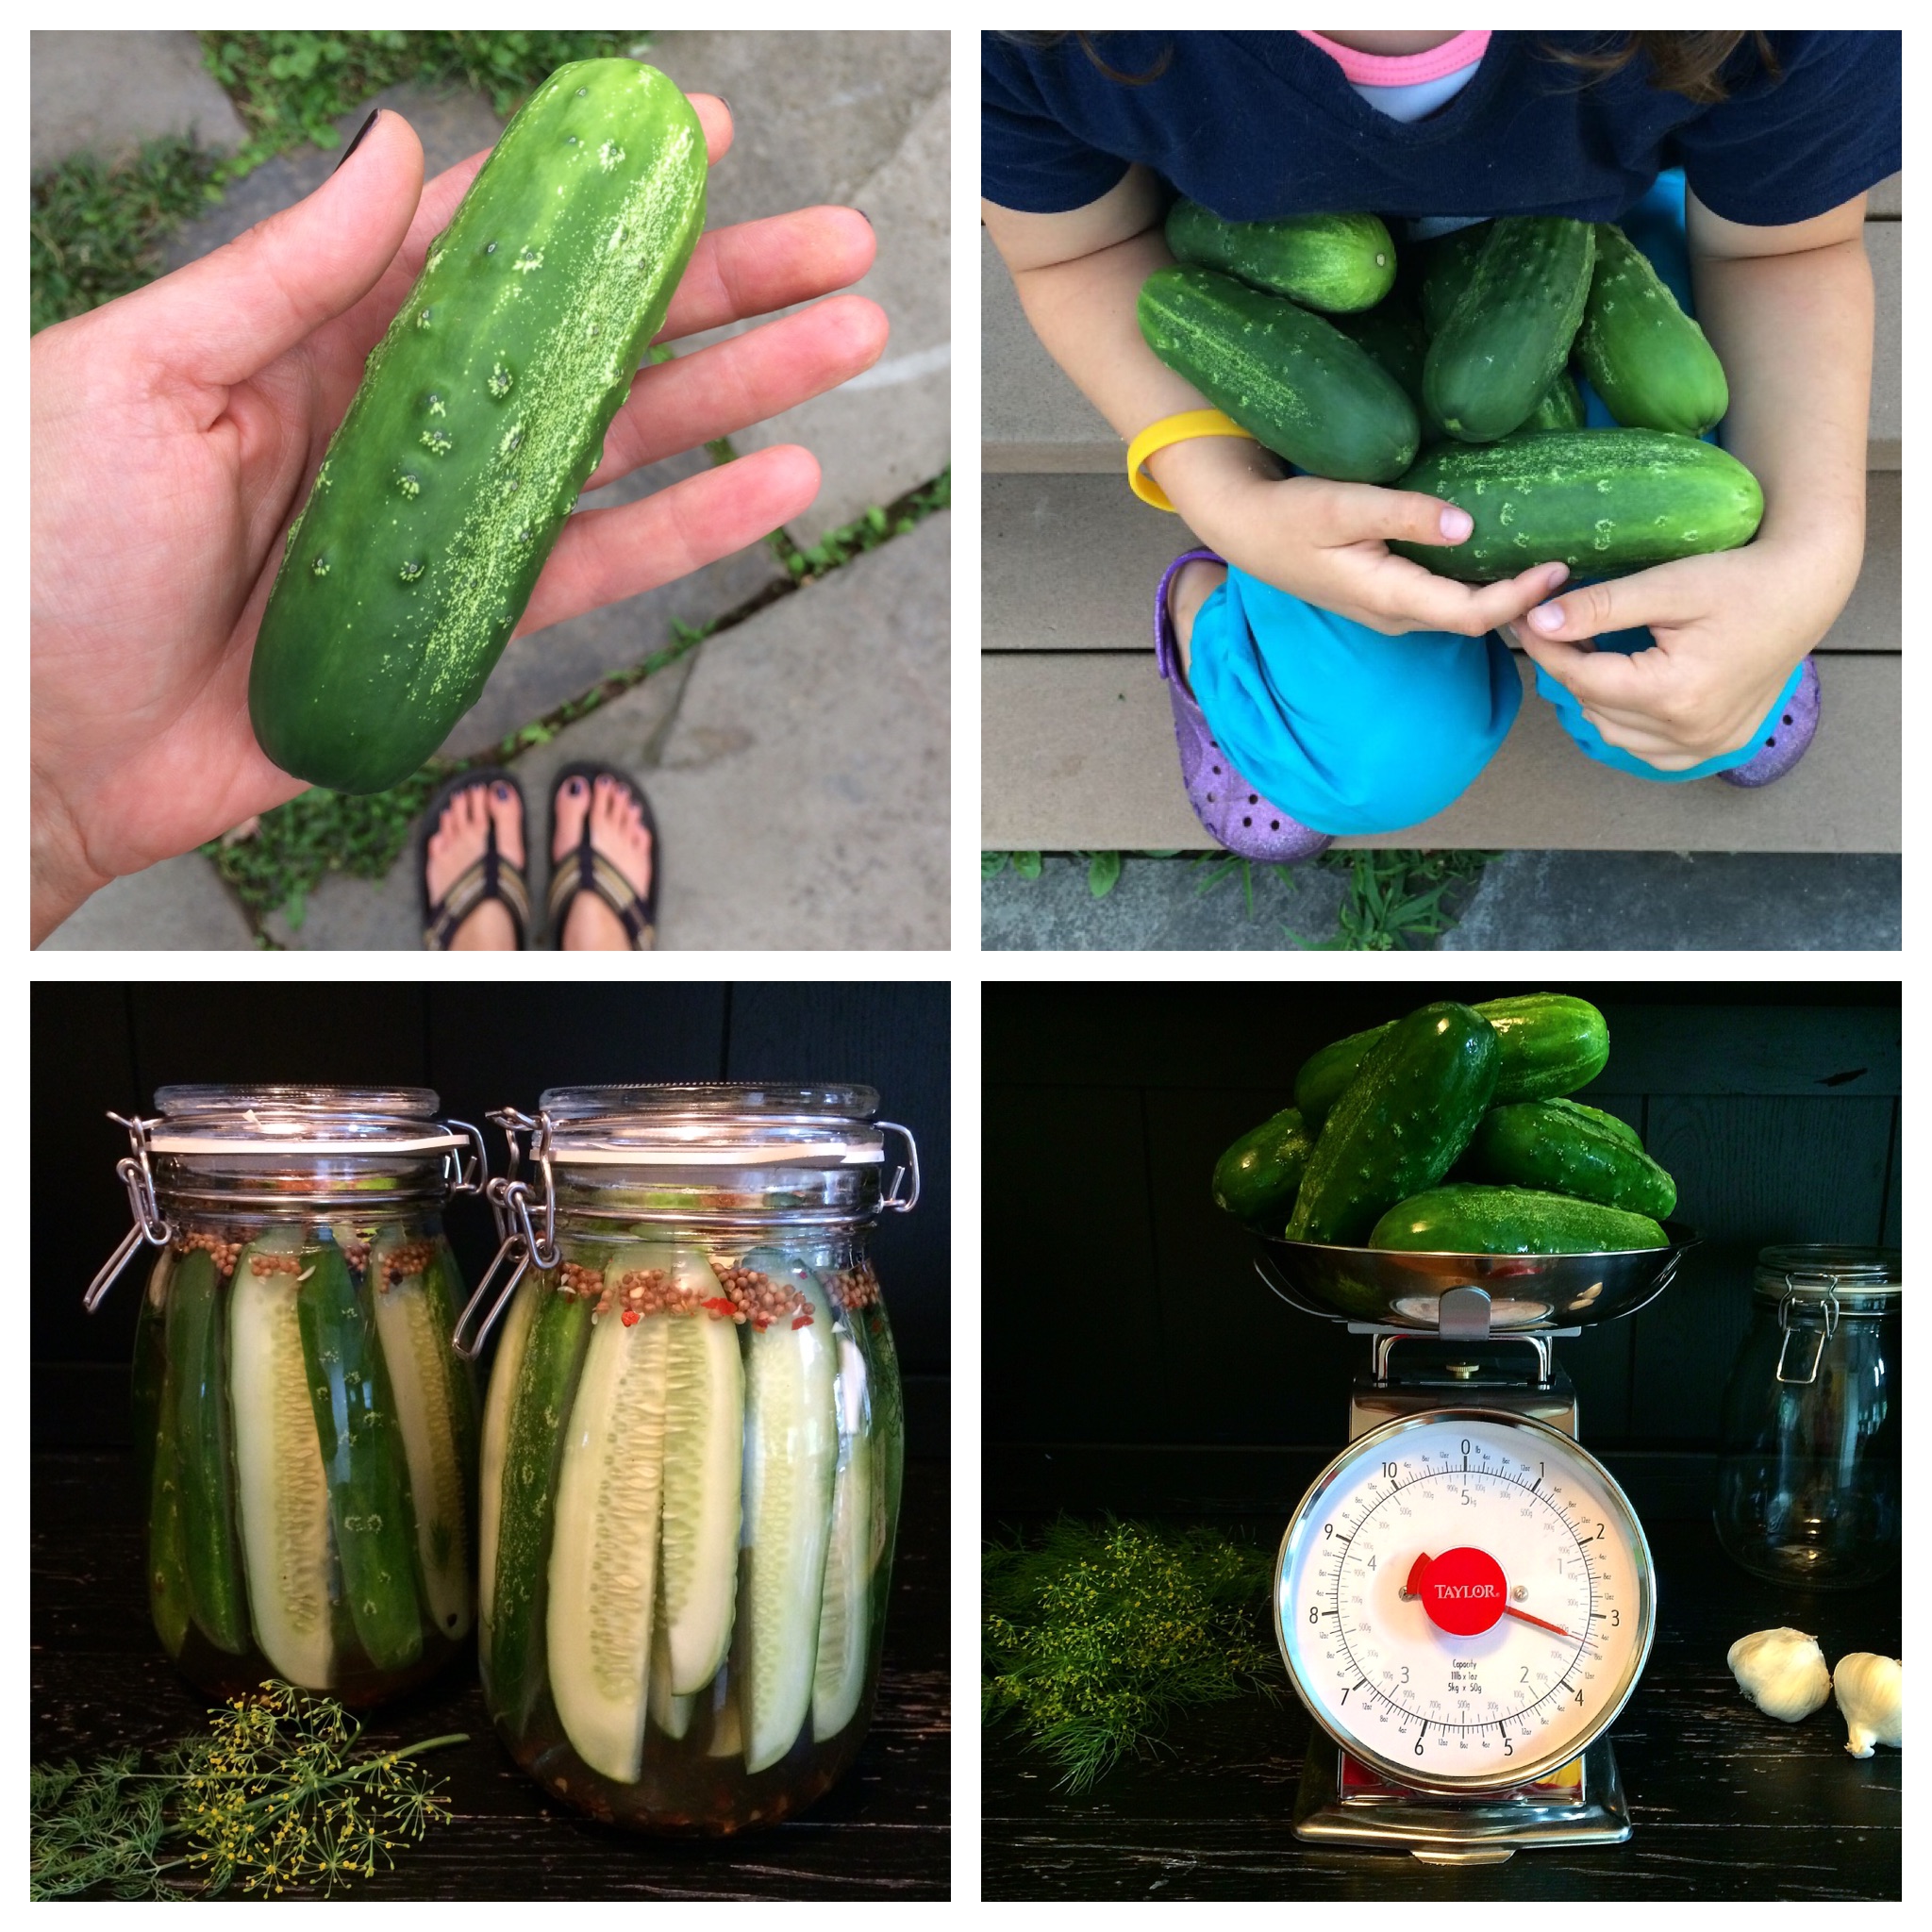
Okay so back to cucumbers. (What, you didn’t know that’s where all this was headed?) This year my garden produced an abundance of cucumbers like never before. I would harvest an armful in the evening and find a bunch more ready for picking the next morning. In the past when I’ve had more cucumbers than we could eat I attempted to make pickles. The results can only be categorized as a total epic fail. Nothing but a heartbreakingly salty, vinegary, mushy mess in a jar. I swore I would never waste my beautiful homegrown cucumbers to pickling again, but that wicked and wily universe I spoke of earlier had other ideas. Flash forward to this Summer’s bumper cucumber crop. My daughter (and fellow cucumber lover) and I have eaten cucumbers as a snack on a near daily basis, I’ve exhausted every salad and sandwich recipe I have in my repertoire, I’ve sent them to work with my husband and given dozens away… yet I’m still faced with more on the vine. “Pickles Mom. Just make pickles.” my daughter says matter-of-factly. I considered the idea. Maybe she was right. Maybe I was letting past failures dictate my journey. Maybe it was time to get over it and get on with it.

And so that’s just what I did.

Simple Refrigerator Dill Pickles
These were delicious and the perfect way to use all your homegrown lovelies.

image

3 cups distilled white vinegar
3/4 cup kosher salt
6 tsp. sugar
6 cups cold water
3 1/2 lbs Kirby cucumbers
2 tbsp. coriander seeds
8 large garlic cloves, peeled and halved
1 tbsp. black peppercorns
1/4 tsp. red pepper flakes (optional)
handful fresh dill sprigs
2 – 1 quart jars with lids

  1. Combine the vinegar, water, salt and sugar in a large sauce pot and whisk over medium heat until the salt and sugar are dissolved. Let the brine cool while you prep the cucumbers.
  2. Cut the cucumbers into equally sized spears and set aside. Divide the coriander seeds, garlic cloves, peppercorns, red pepper flakes and dill sprigs between each of the jars. Tightly pack the cucumbers spears in the jars and top with the chilled brine. Cover and refrigerate for at least 48 hours, giving a little shake now and then. The longer the cucumbers are allowed to sit in the brine the less “new pickle” they will be and the more “traditional” dill pickle they will become.

*adapted from bon appetite

jackalope + the bees knees

Well hello there. Long time so see. Yes I know it’s my fault that we don’t connect more. Yes I know that I promised to keep in touch. Yes I know that fourteen weeks ago I apologized for being so elusive and swore that changes were afoot. Yes I know. But here’s the thing…

I’ve been busy.

To give you an idea of what I’ve been up to I’ve decided to offer you a visual journey through the past fourteen weeks of my life. It begins with tiny little seedlings that I started in ice cube trays in the house, and ends with a shot of the garden in full growing glory. In between there’s a whole bunch of fabulous, frivolous and food-centric fun going on. Okay ready? Here ya go…

grid2

So, besides the obvious gardening and harvesting, cooking and cocktail enjoying (really the key to managing the madness) we’ve also spent some time NYC, we’ve done some shopping at my favorite Asian market (the kids are now Yan-Yan aficionados!), we’ve roasted marshmallows on our new fire-pit and celebrated my littlest loves birthday at Monster Jam (she’s a total tough-chic). You may have noticed all the bee images, that’s because in May we became the host yard to a hive of Italian honey bees. They’re fabulous for my garden, a fantastic learning opportunity for my children and since pollinators are responsible for one out of every three bites of food you eat, they’re my opportunity to give back to Mother Nature. Just after the bees arrived we also became the forever family to a full of spit n’ vinegar kitten. Jack was a tiny ball of fur that was initially considered just another sad story. A few weeks and a whole bunch of TLC and Jackalope (it’s how he gallops) is a happy, healthy, 2 lb 14 oz  mischief-maker and a “I can’t remember what life was like before him” part of our family.

Over the past fourteen weeks we’ve also been busy cooking up a storm on my husband’s new swanky smoker. He’s smoked everything from turkey to pit beef, ribs to red potatoes. I on the other hand have discovered that the GIANT cast iron pan a certain someone gifted me is ideal for outdoor frying– hello chicken and calamari!. Since my last post we also wrapped up baseball and soccer season (and not a minute too soon) and said so long to kindergarten and fifth grade and hello to Summer break (big sigh). Oh and then there’s work, which is crazy and exploding in the best possible way.

So you see, I wasn’t kidding. I’ve been a busy girl!

Since the arrival of the bees I’ve been thinking long and hard about honey. It’s my understanding that with a new hive I may not get honey in the first year. Okay, no biggie. This hasn’t stopped me from perfecting a honey recipe for when that real deal honey from my own hive shows up. You may be thinking honey cake or baklava, used as a glaze or drizzled on homemade yogurt; but you’d be wrong. Nope the recipe I’ve been perfecting is one with such a long and illustrious history that it was once considered illegal. A recipe in fact so perfect that it’s quite honestly “the bees knees.”

“The Bee’s Knees cocktail is a gin, lemon and honey classic that dates back to prohibition. The phrase ‘bee’s knees’ was prohibition-era slang for ‘the best’. In that time, the addition of ingredients such as citrus and honey were often used to cover the less than ideal smell and taste of bathtub gin. Improving the taste of an inferior gin may have been the goal, but the result was a fantastic concoction that can hold its own today.”

At heart I’m a wine girl. However since gin happens to be my favorite summertime spirit, I stumbled across a “Bee Knees” recipe calling for fresh basil (of which I have tons), and I find it impossible to say no to a cocktail with a fun backstory I decided to mix myself up one.

I have but one comment: I would have survived nicely during prohibition.

The Bees Knees with Fresh Basil
Daisy Buchanan may not have added basil to her “Bees Knees,” but that certainly doesn’t mean that you can’t!

bees knees

3 oz. gin
3 large fresh basil leaves, plus a sprig for garnish
1/2 oz. fresh lemon juice
3/4 oz. honey syrup*
lemon seltzer, to taste
lemon rind, to garnish

  1. Add the basil leaves to a cocktail shaker and using a muddler (or handle of a wooden spoon) bruise the basil. Add the gin and lemon juice, fill with ice & shake vigorously.
  2. Strain into a glass filled with ice, add the honey syrup and top with seltzer to taste. Garnish with a fresh sprig of basil, a twist of lemon rind if desired and enjoy!

*To make honey syrup; combine equal parts honey to heated water and stir until honey is dissolved, let cool.

**adapted from aviation gin

meet me in purgatory strawberry buttercreams

It’s finally Spring, can you believe it? Yeah me neither. So long cold, dark and please don’t make me get out from under these nice warm covers days of Winter. Hello sunny, bright and full of possibility days of Spring. 

The past six months have been a whirlwind. I’ve been so busy with work, life and family that I haven’t been able to properly focus on blogging or even cooking for that matter, and that’s been a real disappointment to me. The older I get the more clearly I’ve come to realize that life is far too short to live in a state of disappointment. So… I‘ve decide to embrace the renewal, rebirth and revitalized spirit of Spring and to find time for the little things that bring me the greatest satisfaction. To get up a bit early just to have some quiet time to drink coffee on the deck, to putter around in the garden rather than spend the time straightening up the house and to cook (and blog) far more often. It won’t be easy but in my experience anything worth doing often requires a bit of extra effort. I’m approaching this venture determined to just stop and slow down. As I was making this personal declaration a friend happened to post this tweet: “People who insist on making homemade Easter candy will never be welcome in the kingdom of heaven.” After I finished laughing I decided to take this as a sign that the universe wanted me to make a little Easter candy. And so I did.

In my mind Easter is synonymous with chocolate. Not jelly beans, marshmallow chicks or cream eggs. Nope, for me its all about chocolate. In the past I’ve made peanut butter cups and chocolate almond bark. I’ve dipped fresh cherries and tangerine segments in dark chocolate and I’ve made simple chocolate lollipops. This time around I wanted to make something a bit more extravagant. This time I wanted to make something that tasted fresh like the season. This time I wanted candy so good it would redeem me from my months of lack luster cooking. So this time I made chocolates filled with homemade strawberry buttercream. And they were delicious— Kingdom of heaven be damned.

Strawberry Buttercream Chocolates
I used Trader Joe’s freeze-dried strawberries for this recipe. They also sell freeze-dried blueberries and raspberries, which would no doubt also make a delicious filling.

strawberry creams

1  1.2 oz package freeze-dried strawberries
1 cup powered sugar
pinch salt
4 tbsp. unsalted butter, softened
2 tbsp. heavy cream
3 4 oz. bars bittersweet or dark chocolate
special equipment: silicone candy mold

  1. Place the candy mold in the refrigerator to chill. Pour the strawberries into the bowl of a food processor (being sure to remove the silica packet) and process to a fine powder. Add the powdered sugar and pulse a few times before adding the salt, butter and cream. Turn the food processor on and allow to process until the mixture gathers into a loose ball, this takes a little time so be patient.
  2. Wrap the ball of filling in plastic wrap and place in the refrigerator to chill while you melt the chocolate.
  3. Break up the chocolate and use a double-boiler (or a glass bowl placed over a pot of simmering water) to melt the chocolate, stirring frequently. When the chocolate is totally melted and smooth remove from heat.
  4. Remove the chilled mold from the refrigerator and fill each opening halfway with chocolate (I used a little paint brush to spread the chocolate up the sides.) Place the filled mold back in the refrigerator for 15 minutes to set.
  5. Remove the chocolate mold and the wrapped filling from the refrigerator. Pinch off a 1/2 teaspoon sized piece of filling, roll it into a ball and carefully press it into each of the set chocolates. Cover the filling with additional chocolate (you may need to warm it again) filling each mold to the top. Place the filled mold back in the fridge to chill until firm, about 1 hour.
  6. Carefully pop finished chocolates out of mold and enjoy!

brass bra popovers

Have you been outside recently? It’s gives new meaning to the phrase “It’s colder than a witch’s tit in a brass bra!” Seriously, it’s the kind of cold that makes you want to pack the family up and buy a beach shack in Fiji. (The cost of living has to be better than New Jersey and think of all the tourist worthy souvenirs the kids will learn to craft out of coral and palm fronds!) Yup Fiji definitely seems to be the way to go, but until those change of address cards hit the mail I’ve been doing my best to keep the family warm with knit hats, flannel pj’s and giant comforting pots of hearty soups and stews.

I’ve been the butcher, baker and candlestick maker behind the famous (or is it infamous) beets and blue cheese dot com for three plus years, and in that time I’ve posted twenty-three recipes in my soups and stews category. Twenty-three… that’s a lot! I’ve given you everything from Fish Chowder with Bacon and Butternut Squash to Slow-Roasted Tomato BisqueHomemade Wonton to Curried Carrot & Parsnip. Creamy Broccoli & Kale to Cold Cucumber and Potato. Not to mention recipes for Chicken Stout StewTurkey and Bean Chili or good ol’ Classic Beef Stew. And with each recipe I suggest you serve it with homemade rolls or rosemary soft pretzels, bialys or blue cheese crackers; something wonderful and freshly baked. Usually I take my own advice and bake something yummy to serve on the side, but recently I’ve been feeling restless. I’m tired of the same old drop biscuits or cornbread, I want adventure!

Hello popovers.

Back in the day popovers were my thing to make at Thanksgiving. They seemed fancier than your standard roll, required special equipment (something this new cook was happy to go out and buy) and made everyone ohh and ahh when they came out right. When being the operative word. I’m still not positive which recipe I was following, my guess it was it mash up of two, but while they worked like a charm one day they were a giant flop the next. Annoying, aggravating and enough to make this gal shelve her popover pans for years. I came upon those pans the other day and since I happened to be feeling invincible, decided it was time to give them another whirl. However this time I went directly to the source; King Arthur.

When it comes it baking the folks at King Arthur really do seem to know a thing or two. They have blogs and hotlines, recipes and communities, products and classes… they are the undoubtedly the end all and be all of baking information. My family and I actually visited the King Arthur Flour Vermont campus this past summer and honestly if they would have agreed, I would have moved in. It’s an amazing place filled with baking, eating, learning and buying opportunities all set in the beautiful Vermont countryside. A total baking mecca. Anyway back to those popovers— According to the baking gurus at K.A. the ultimate popover is in fact not the result of starting them off in a cold oven, nor does it matter if you use a blender or whisk the batter by hand. No according to them it’s the temperature of your ingredients that are the key to perfectly puffy popovers. Interesting. So armed with some fresh popover baking advice and a King Arthur recipe I focused my attention on baking up a batch of my own. And guess what? Perfectly puffy popovers!

Oh yeah, I’m back baby. I am back.

Super Simple Popovers
These are truly so easy to make you’ll find yourself enjoying popovers all the time.

popovers4

4 large eggs, warmed in a cup of hot tap water for 10 minutes before cracking
1 1/2 cups low-fat milk, lukewarm
1/2 tsp. fine sea salt
1 1/2 cups Unbleached Bread Flour
3 tbsp. melted butter

  1. Position the oven racks on a lower portion of the oven and preheat the oven to 400°F.  
  2. Thoroughly grease* a popover pan (or standard 12-cup metal muffin tin, one whose cups are close to 2 1/2″ wide x 1 1/2” deep).
  3. Traditional method: Whisk together the flour and salt. In a desperate bowl whisk together the milk, eggs and melted butter. Add the flour mixture and blend until just combined.
    Blender method: Place the milk, melted butter, flour, salt and eggs, lightly whisked, into the jar of a blender. Blend on high for several seconds, 
    then stop to scrape the sides. Blend for an additional few seconds but do not over blend
  4. Pour the batter into the popover tin, filling each cup about 3/4 full.
  5. Bake the popovers for 20 minutes without opening the oven door. Reduce the heat to 350°F (again without opening the door), and bake for an additional 10 to 12 minutes, until they’re a deep, golden brown.
  6. As soon as you remove the popovers from the oven stick the tip of a knife into the top of each to release steam and help prevent sogginess. Let the popovers cool slightly in the pan then remove and serve.

*I’ve experimented with several types of fat to grease my popover pans including butter, vegetable shortening and bacon grease. The bacon grease seemed to work the best, followed by the butter. But you be the judge.

**adapted from King Arthur Flour

winging it… again

The most highly anticipated day of any football lovers year is right around the corner. Frankly, I don’t like football. Nope, not at all. Sure I’ve been to Giants games. Sure I’ve drunk beer, eaten pretzels and cheered for big blue. Sure I’ve asked “Who’s winning?” on many a Sunday afternoon. But in all honesty, there’s nothing about the sport that appeals to me. However I realize I’m in the minority (particularly at this time of year) and so I make an effort to pretend to care.

I had planned on this years effort manifesting itself as some out of the box delicious Super Bowl Sunday treat. I would tell you a long-winded story about it, give you the recipe and close the book on yet another football season. But karma got in the way. You see last week I was busy bragging to anyone that would listen about how my entire family was sick but me. And how I fully attributed my reigning health to the super green smoothies I drink everyday. The universe is a funny thing. Don’t let it see you getting too full of yourself or before you know it… playing fields will be evened. (Did you catch that little hook back into football? I know, I’m good.) Anyway, the universe is now having a nice little chuckle at my expense because this week I’m living on Jakeman’s cough drops and sound like Harvey Fierstein. Yeah, karma really is a bitch. Instead of giving you something new and fabulous, I’m reposting last years Super Bowl entry along with my recipe for Grilled Asian Wings— and I’m going to make myself a cup of tea.

So until next season… May your teams be tough and your balls fully inflated!”

PREVIOUSLY POSTED ENTRY: It seems to me that Super Bowl Sunday has very little to actually do with football and a lot to do with Clydesdale commercials, half-time wardrobe malfunctions and trashy food you would never ordinarily consider eating. You know the kind I’m talking about— bowls of melted velveeta and salsa served with Fritos (hmm, who knew they still made Fritos?) piping hot pizza bites and mini hot dogs (I’m sure there’s not that much MSG in them, right?) and of course deep-fried wings with a side of bottled blue cheese dressing (limp celery stalks optional). But before you get the wrong impression here’s the thing… I happen to like wings. In fact there’s a coal-fired pizza joint nearby that makes the most delicious caramelized onion and rosemary wings that I like to order with a side salad. So you see it’s not the wing itself I take issue with, it’s the prepackaged, deep-fried, preservative laden aspect of your typical trashy wings I dislike. If I’m going to eat a wing I want some thought to have gone into it, some consideration for the flavors in combination with the cooking method. I want someone to have given that wing a little love long before it ever hits my plate.

While I don’t have a coal-fired pizza oven, I do have a gas grill and a Weber cookbook, which as it turns out is all I really need. A few pounds of wings, some Asian ingredients, a little grill time and voilà… Delicious without apology wings. I realize as I type this that the temperature outside is only 18°F, not exactly standing at the grill weather. I have but one thing to say about that—

Toughen up buttercup. This is football!

Grilled Asian Wings
These are delicious and far less guilt inducing than your typical wings.

wings6

1 medium leek, halved and sliced thin
2 tsp. Thai red curry paste
1/2 cup tamari soy sauce
5 tbsp. dark brown sugar, packed
4 tbsp. unseasoned rice vinegar
4 tbsp. toasted sesame oil
3 tbsp. fish sauce
3 tbsp. peeled, grated fresh ginger
4 garlic cloves, minced
2 1/2 lbs. chicken wings, tips removed

  1. Add all the ingredients (except the wings) to a medium bowl and stir to combine. Pour all the marinade except for 3 tablespoons into a large ziploc bag, place the wings in the bag and seal tightly. Turn the bag to insure all the wings are coated and allow to marinate for an hour.
  2. Prepare your grill by brushing the cooking grates clean and heating the grill to 350°F.
  3. Carefully oil the grates and grill the wings over medium heat, with the lid closed, until they are well browned and cooked through (turning them several times), 15 to 25 minutes.
  4. Transfer the cooked wings to the large bowl and drizzle with the reserved marinade. Serve warm and… Go team!.

*adapted from weber

spaghetti squash vs. carnivore casserole

I’m not typically one to make new year resolutions. Instead I like to use the dawning of the new year simply as a time of reflection. Recently I’ve been reading a considerable amount about the power of the plant. Articles talking about how tiny microgreens and blue-green algae are total nutritional powerhouses and the overall health benefits of a more plant-based diet. This got me to thinking and thinking got me to deciding that 2015 should be the Greco family’s “Year of the Vegetable”. Don’t get me wrong, I’m not totally giving up meat. I still fully plan on curing and smoking another slab of bacon when the weather warms up and I’ll never say no to a pastrami sandwich from The Deli King of Clark, but I feel like we could all benefit from a little more of nature’s candy and a little less of nature’s inhabitants.

Since I’m already such a veggie lover this undertaking really shouldn’t be that great of a personal challenge, no the trick will be getting my family to switch to the green side. Of course knowing full well the reaction it would get, I didn’t discuss this plan with them. Instead I’ve decided to be stealth about it; add a few more veggies to soups here, some greens braised there, fresh fruit smoothies in the morning with a few carrots added in “just added for color” and lentils and beans more often for some good ‘ol fashioned non-meat protein. My plan was coming together nicely, I was subtly reducing their meat consumption while upping their vegetable intake and they were none-the-wiser. But then I got greedy. I few too close to the sun. I messed with the bull without expecting the horns. I was drunk with power and made a casserole of spaghetti squash, kale and smoked mozzarella… and I expected them to eat it. I was wrong.

My son ate most of his but not before declaring it “seriously not worth making again”, my daughter on the other hand couldn’t even muster than much of an endorsement. Instead she made a wild-eyed retching pantomime, waved her arms frantically and ultimately consumed about two forkfuls before flat out stating that she was DONE! I however thought it was delicious. Seriously… really, really good. And my husband agreed with me. (Of course I was angry with him at the time, so there’s a strong possibility he just may have been trying to get on my good side.) Anyway I honestly thought it was delicious and totally worth a repeat performance, but there’s a chance I may be alone on this one.

So the moral of this story is never be afraid to try something different and… You can lead a horse to water, but you can’t make a carnivore love spaghetti squash casserole.

Baked Spaghetti Squash with Kale and Smoked Mozzarella
This was really delicious. Really.

spaghetti squash2

1 4 lb. spaghetti squash
1 tbsp. olive oil
1 large onion, diced fine
4 garlic cloves, minced
9 oz. frozen chopped kale, defrosted
1 tsp. salt
1/2 tsp. black pepper
1/2 cup plain Greek yogurt
2 eggs, beaten
2 cups spaghetti sauce (homemade or jarred)
16 oz. fresh smoked mozzarella cheese, shredded
1/2 cup fresh parmesan cheese

  1. Preheat oven to 375°F. Cut the squash in half lengthwise, remove all seeds and place on a rimmed baking sheet face down. Add some water to the bottom of the baking sheet and bake for 40 minutes or until tender. Remove from oven and allow to cool. Keep the oven on.
  2. Heat oil in a large skillet over medium heat, add the onions and minced garlic and saute for 4-5 minutes or until onions are translucent. Add the chopped kale, salt and pepper and continue cooking another 2-3 minutes, until kale is tender. Remove from heat.
  3. Once squash is cool enough to handle, use a fork to shred the squash into large bowl. In a medium bowl whisk the eggs. Add to the eggs the Greek yogurt and 1/4 cup of the parmesan cheese. Add the egg mixture to the squash strands and stir to combine.
  4. Pour 1 cup spaghetti sauce into a large baking dish. Spoon some spaghetti squash mixture over the sauce and spread evenly. Then add a layer of sautéed kale and onions over the squash, then half of the shredded mozzarella cheese. Top with another layer of squash, then kale, another cup of spaghetti sauce, the remaining mozzarella and finally the last of the Parmesan cheese.
  5. Bake for 35-40 minutes, or until bubbling and nicely browned on top.
  6. Allow to cool for 15 minutes before serving.*

*I’ve found that the longer the spaghetti squash is allowed to sit and cool, the less watery it ends up.

pancakes for the win

Everyone has a different tradition when it comes to kicking off the holiday season. For some people it revolves around things like ‘Black Friday’ shopping, extreme home decorating or proudly wearing a truly ugly sweater. For others it’s taking the kids to see Santa, sending out that years Christmas card (after agonizing over the picture) or seeing the first flakes of snow. For me it’s all about putting up the tree. Once that white light twinkling, ornament festooned, towering cone of green takes over the corner of my great room it’s ‘game on’. (Although to be honest there have been some years when I started working on my holiday gifts in September. There was the year everyone on my gift list got a hand knit scarf and another year when everyone got baskets of homemade goodies. I made and jarred my own applesauce, bottled my own flavored vinegar and made biscotti, nutella shortbread cookies and toasted almond crack like I was the last baker on Earth. And then I designed and printed my own labels and gift tags. Yeah, that year almost killed me.)

This year however is a different story, This year ‘game on’ is more like “Umm, what? There’s a game? Where?” You see even though we put up the tree earlier than usual and the house has been in a jingle all the way state for sometime— I have yet to knit a stitch, bake a crumb or even get my Christmas cards into the mail. Between the craziness of school assignments and obligations; “Sure I’ll come read to your class on my only day off.” “Yes I remembered the cash for your (crappy and overpriced) ‘Holiday Shop’. ‘The bow on your violin is damaged? Okay let me contact the music people, work out the details of getting a new one and then remember to send the damaged back to school with you.” (I didn’t remember. They had to remind me. It took several weeks to get the new bow. It hasn’t improved his playing.) “What time is your holiday concert and what exactly qualifies as your ‘holiday best’ outfit?” Your Minecraft shirt is green, will that work?!?” “You need how many holiday cards signed and addressed by you (and only you) for your kindergarten classmates? And by when?” “Oh and stocking stuffers for each and every one of them as well? Fantastic!” “No of course were not just giving money for a boring old class gift. Special teacher presents for everyone!” Not to mention we had a soccer season that lasted until Thanksgiving and basketball practice that started soon after, the double-whammy of both kids down with step and ‘Readers Workshop’ books needing to be read nightly and the accompanying flow chart updated (Ok so we got a bit behind on that and had to read six books on one night to catch up). With all this going on I haven’t exactly had the chance to properly pull together Christmas, and now that jolly ol’ Saint Nick will be here in only a handful of days the pressure is seriously on. Which brings me to the point of this post: pancakes. Ha! Betcha didn’t see that one coming did you?

For me pancakes are synonymous with Sunday mornings and Sunday mornings have to be without a doubt my favorite part of the week. On Sunday I get to enjoy my coffee (not guzzle it down before rushing out of the house), I get to read the paper or watch the news and I get to say “What do you want for breakfast?” and have it mean something other than toast or cold cereal. Sunday is the one day that breakfast means bowls and whisks, skillets and spatulas, time and effort, comfort and care. Often that resembles a stack of pancakes. My kids love pancakes. Love them. LOVE THEM! Pancakes with chocolate chips. Pancakes with diced strawberries. Pancakes with bananas. Even pancakes straight up. If you’re offering pancakes they’re eating! And so because I like Sunday mornings and they like pancakes and I like them… I make pancakes, frequently. In fact even when the week prior has been crazed and the one coming up looks no better. When Rudolph and his team are breathing down my neck and I don’t feel remotely filled with good cheer. Even when I’m officially out of time, energy and ideas… A Sunday morning stack of pancakes is never entirely out of the question. Why? Well because pancakes make them happy and because someday I hope they look back on these Sunday morning breakfasts nostalgically. And because good homemade entirely from scratch pancakes are actually easy. “Easy like Sunday morning…”

Simple Homemade Pancakes
I know it’s easy to open a box of pre-mix and just add a little water, but this recipe really is simple and the pancakes are delicious.

pancake

2 cups whole wheat pastry flour
1 tsp. granulated sugar
1 tsp. ground cinnamon
4 tsp. baking powder
1 tsp. salt
2 eggs
1 1/2 cups low-fat milk
1/4 cup vegetable oil

  1. In a large bowl whisk together all the dry ingredients. Set aside.
  2. In a medium bowl beat the eggs, then whisk in the milk and oil.
  3. Add the wet ingredients to the dry, whisking until just incorporated and a few small lumps remain.
  4. Lightly grease a skillet or large griddle and heat. Pour 1/4 cup batter onto the hot griddle and cook until bubbles begin to form on the surface. Flip and cook the opposite side until done. Serve with butter and plenty of maple syrup.

a beacon in the night chowda’

This is recipe makes me think about a cold rainy Summer day in Cape Cod. Let me set the scene; It was the 80’s and my family had decided to go to the Cape for our annual vacation. I had a ‘totally mint’ new pair of flashy red sunglasses, Bruce Springsteen’s “Brilliant Disguise” was playing nonstop on the radio that Summer (and I sorta new all the words) and my favorite partner in crime would be joining us on the trip. Good times were clearly on the horizon! And then the bottom fell out…

First I discovered that we’d be camping on the Cape— I hate camping. Secondly my cousin who had planned to come along got sick and bailed, so it was just pre-teen me and my parents. Ugh. And then it rained.

Rain is never fun on vacation. Rain when you’re camping on the Cape is even less fun, take my word for it. Rest assured we made the best of it and continued to sightsee and explore just as we would if the sun had been shining. (“What can I tell you? Let’s just make the best of it.” was such a frequently used phrase in our house I should have had it printed on a t-shirt.) However those damp Summer days actually did hold two bright spots for me; The first was finding an old-fashioned penny candy store where a couple of dollars could still buy you a boat load of sugary goodness and the other was a truly no-nonsense lunch we stumbled into one afternoon.

We had clearly spent the morning out in the elements ‘making the best of the situation’ because I remember being cold, wet and unhappy in a sulky pre-teen kinda way. We then piled back into the truck, destination unknown, when my father abruptly decided to steer the car down to the end of one of the docks, just to see what’s there. That’s when we found a tiny dockside shack that made and sold steamy cups of soup. New England, Manhattan and whatever the fisherman had caught that day Fish Chowda’. The rain drizzled down and seagulls swooped from piling to piling while we ordered and quickly took it back to the truck to stay dry. And then suddenly the clouds lifted, the sun shone through and like a beacon in the night or manna from heaven the soup instantly warmed us and lifted our spirits! (Okay so it wasn’t actually that dramatic. It in fact continued to rain and I was sandwiched between my parents eating soup out of a styrofoam cup with a plastic spoon. But… the soup was seriously delicious and it did warm my chilled body and make the remainder of my soggy day more tolerable. And frankly, that says something.)

So the moral of this story could be something like: It never hurts to try and make the best of a situation; don’t be afraid to suddenly take a new road or it is possible to find simple, delicious, perfection in a little styrofoam cup!

Fish Chowder with Bacon and Butternut Squash
This reminds me of summer at the Cape and works perfectly well with either haddock or cod.

cod chowder

5 slices thick cut bacon, diced
1 medium onion, diced small
4 stalks celery, sliced thin
1 tbsp. fresh thyme leaves
1 2 lb. butternut squash, peeled and diced
1 tbsp. flour
1/4 cup cream sherry
3 cups fish or chicken stock
1 cup bottled clam juice
1 1/2 tsp. salt
1/2 tsp. black pepper
1/2 tsp. smoked paprika
1 1/2 lbs. skinless haddock or cod fillets
1/2 cup heavy cream
cayenne pepper, for garnish

  1. Dice the bacon, add to a large stock pot and cook until crispy. Remove with a slotted spoon and set aside. Add the diced onion, celery and thyme to the bacon fat and cook until the vegetables begin to soften.
  2. Add the flour to the pot and allow to cook until golden brown. Then add the sherry to deglaze the pan, being sure to scrape up any stuck on bit from the bottom.
  3. Stir in the stock, clam juice and butternut squash and allow to come to a boil. Reduce the heat and allow to simmer until the squash is just tender 10-12 minutes.
  4. Cut the fish fillets into large bite sized pieces. Stir in the salt, pepper and smoked paprika. When the squash is tender add the fish to the pot, cover and simmer until it flakes apart easily, about 4-5 minutes. Stir in the cream and allow to cook for 2 more minutes.
  5. Serve with a hearty sprinkle of cayenne pepper.

*inspired by epicurious

ya can’t beet a brownie

I don’t know about you but I love brownies. Rich, chocolatey, cakey, satisfying brownies. No nuts. No frosting. No edges. (I’m a center of the pan kinda girl.) I love those classic, foundation of many a bake sale and potluck, way better than a slice of cake treats— But I almost never make them. Why? Because while they exude an air of nostalgia and casual effortlessness, they are in fact persnickety little monsters and total baking with ease impostors. Let me explain..

Over bake them and they’re tough and chewy, sticking to the pan and in your teeth. Under bake them and they’re a mushy, gooey, fall apart mess. And then there’s the cooling factor. Even if you time the baking exactly right you still have to let them cool an inordinate amount of time before even attempting to cut into them. Can’t fight you’re impatient inner child and start slicing while they’re still too warm… Hello stuck to the knife brownie mess! And honestly, whom among us hasn’t been lured into making a batch (whether it be from scratch or boxed) only to end up standing at the counter scraping bits of brownie off the bottom of the pan, smushing them together to create a pitiful brownie lump and shoveling them into your mouth so as to not have your efforts wasted. All the while swearing “NEVER AGAIN”. I know, I’m with you. I’ve totally been there. Which is why it’s all the more surprising that I decided out of the blue to make brownies from scratch. Perhaps I was feeling invincible or perhaps I was simply feeling that keeping up with work, kids and home wasn’t enough of a challenge that week. Whatever the case may have been there I was whipping up a batch of brownies for two sick kids. (Oh yeah, did I forget to mention that my kids were both home sick from school. Yup, they were. Two sick kids. Both home. Two days. Good times.) Anyway… Amid the chaos that was last week I decided to make brownies, no doubt as much for myself as for them.

I’m a bit of a recipe pack-rat; squirreling away magazine pages, newspaper clippings and dozens of forwarded to myself emails containing recipes that I plan to make “someday”. One of the scraps of paper at the top of my pile was a brownie recipe from C for Food & Agriculture. (If you’re not familiar with Stone Barnes then by all means you should be, it’s an incredible place with an equally amazing restaurant Blue Hill at Stone Barns smack at the center.) The recipe was for rich, decadent brownies with a subtle orange flavor and beets as the secret ingredient. This wasn’t the first time I had decided to sneak beets into my baked goods, remember those yummy Chocolate Cake Donuts with Chocolate Ganache, so I jumped right in. I knew the beets would add moisture and texture to the mix and that once cool, their flavor would be virtually undetectable. And I was right, they were delicious! Rich, moist and chocolatey with just the right hit of orange and just the right amount of soul soothing decadence to make this harried mom and her two sick kids feel momentarily better.

The kids are thankfully on the mend and everyone will be heading back to school (and work) tomorrow, perhaps with a tasty little square of Orange-Beet Brownie tucked into their lunch boxes. Unless of course I tell them the brownies are all gone and secretly polish off the rest myself. A little white tie never hurt anyone and frankly, I think I’ve earned it.

Orange-Beet Brownies
Once these babies are cool no one would ever guess they contain beets!

beet brownie3

3 small beets, trimmed
8 oz. good-quality bittersweet chocolate (such as Ghirardelli 60% cacao)
1 stick salted butter, diced
1 cup granulated sugar
3 eggs
zest of 1 orange
3 tbsp. orange juice, divided
1 1/4 cups self-rising flour*
confectioner’s sugar, for dusting

  1. To make the beet purée: Preheat oven to 400°F, wrap the beets in foil and roast for 45 minutes or until the beets are easily pierced with a fork. Let cool until they can be handled easily, then peel and dice. (I usually do this the day before I plan to bake the brownies.)
  2. Add diced beets and 1 tablespoon of orange juice to the bowl of a food processor and blend to a purée, set aside to cool.
  3. Lower oven temp to 350°F and lightly grease an 8×8 pan, set aside.
  4. Break the chocolate into pieces and place in a heatproof bowl over a saucepan of simmering water. Add the diced butter and let melt, stirring often.
  5. In another bowl, beat the sugar with the eggs until smooth and creamy. Stir in the orange zest and remaining orange juice, puréed beets and flour. Then slowly add the melted chocolate and beat until fully combined.
  6. Pour the batter into the prepared pan and bake for 35-40 minutes.
  7. Allow to cool for 15 minutes in the pan before removing to a rack. Then cool for another 15 minutes before attempting to cut. Dust with confectioner’s sugar and enjoy!

*To make gluten-free self-rising flour: Combine 2 cups of gluten-free flour with 3 teaspoons of baking powder and 1/2 teaspoon of salt. Whisk to combine.

*inspired by stone barnes center

the grateful guest

I love party planning; the recipe research, list making, ingredient shopping and tabletop setting. Sure it’s a lot of time, work and money but what can I say— I truly enjoy that meal savored, compliments accepted, pots n’ pans washed feeling of a dinner well done. But ya know what I like even more? Occasionally being the guest rather than the host. Yup you read right, sometimes I prefer to be responsible for nothing more than a hostess gift and a side, rather than the whole shebang. Seriously. Instead of missing out on conversations because I’m stuck in the kitchen, watching the clock like a hawk to ensure that everything comes out hot, washing and packing back away countless pots, pans, dishes, glasses, platters, bowls, napkins and tablecloths… I get to drink wine, nibble on appetizers, chit-chat and relax.

So you may be wondering, what do I bring when the opportunity to be a grateful guest should arise. Well I’ll tell you. I like to bring a bottle of wine, something I know the host will enjoy whether they decide to open it at the gathering or not, and a dish that requires minimal serving effort. There’s nothing worse than having someone show up at your house with a contribution, that in theory is intended to make the dinner easier on you, but in reality requires elaborate assembly and/or preparation. For me the answer is always something that can be made at home, transported easily and (ideally) served at room temperature. Something like a cheese platter, a salad of some sort, dessert (a total no brainer) or an array of crudités and dips.

People love dip, it’s an undeniable fact. Give them something to dunk, dip or slather and they’re happy as clams. And why not— its easy, unpretentious and personally… makes me think of childhood. As a product of the 70’s I have fond memories of old school Lipton Onion Soup Dip served alongside a big ol’ bag of greasy crinkle potato chips. Man, it really didn’t get much better. I would never consider going the Lipton route now but I’m fairly confident that if I did, it would get devoured in no time flat. (Because let’s be honest— corn syrup, hydrolyzed soy protein, caramel color, partially hydrogenated soybean oil, monosodium glutamate and yeast extract may be unhealthy, but they’re just as yummy as they were in 1978!)

When I bring a crudité platter I like serve it with a couple of homemade “healthy” dips. Hummus is always an option and sometimes guacamole, but when I want to switch things up a bit I make Rosemary White Bean Dip or a super simple Feta & Lemon Dip. They’re delicious, can easily be doubled and the leftovers makes great sandwich spreads. I haven’t discounted the idea of attempting to create a healthy/from scratch version of everyone’s beloved Lipton Onion Soup dip, so keep your eyes out for that sometime in the near future. However something tells me that no matter how tasty it turns out, it just won’t compare to my MSG tinted memories.

Rosemary White Bean Dip
The rosemary flavor is very subtle, so even if you’re not a huge fan don’t omit it.

2dips3

5 lg. garlic cloves, smashed
4 tbsp. olive oil, divided
1 fat sprig of fresh rosemary
3 tsp. fresh lemon juice
1 can Great Northern Bean, drained and rinsed
1 tbsp. plain Greek yogurt
1/2 tsp. fine sea salt
1/2 tsp. black pepper
crudités, chips or crackers, for serving

  1. In a small skillet warm 2 tbsp. of oil until it shimmers. Add the smashed garlic and rosemary and sauté until the garlic is golden brown. Remove the rosemary spring and discard, add the garlic and oil to the bowl of a food processor.
  2. Add to the food processor the remaining oil, lemon juice, rinsed beans, yogurt, salt and pepper.
  3. Allow to process until the mixture is completely smooth. Transfer to a serving dish and allow to chill before serving.
  4. Serve with crudités, chips or crackers.

*adapted from serious eats

Feta + Lemon Dip
Seriously simple.

8 oz. block feta cheese
3 tbsp. fresh lemon juice
2 garlic cloves, smashed
3 tbsp. extra-virgin olive oil
lemon zest, for garnish
drizzle of olive oil, for garnish
crudités, chips or crackers, for serving

  1. Break the feta into chunks and place in the bowl of a food processor along with the lemon juice, garlic, and olive oil. Process until smooth and fully combined.
  2. Spoon into a serving bowl, drizzle with a little olive oil, and sprinkle with a bit of fresh lemon zest.
  3. Serve with crudités, chips or crackers.

*adapted from sweet paul magazine

gluten-free… is it for me?

A few weeks ago I decided to try going gluten-free. I’ve had quirky issues with my stomach most of my life (ironic since I’m such a food lover right?) and I wanted to see if making the switch would make a difference. It’s too soon to make any concrete declarations but all signs are pointing to… maybe.

Deciding to change your diet can feel like a daunting task. I’ll be honest, my motto is more “Life is too short not enjoy dinner!” than “Moderation is the key too happiness.” With that in mind I’ve tried my best not to let gluten-free mean flavor-free, but it hasn’t been easy. I’ve discovered that potato chips and wine are both gluten-free (which frankly made me one happy girl) and I’ve come to the conclusion that if you fall into three simple categories you’re certain to find eating well gluten-free to be a snap. And here they are:

1.) You like vegetables and are happy to eat lots of them.
2.) You’re not a big fan of carbs and can give them up without a backward glance.
3.) You’re more of a baked goods buyer than a from scratch baker.

Honestly I’ve got no problem with 1. And I’m actually surprised at how easily I’ve given up 2., but the baking part has been tricky. You see while it’s quite possible to find recipes for ooey-gooey gluten-free cinnamon buns and chewy chocolate chip cookies; these recipes are often labor intensive and usually require a boat load of special ingredients. Ingredients such as tapioca and rice flour, xanthan gum, potato starch and agar flakes, things you probably don’t exactly have lying around the pantry. Yeah, I know— annoying. I’ve decide that if I stick with this little wheat-free detour then perhaps I will make the ingredient investment, but until then I’ve been trying to manage with my own little tweaks and substitutions. So what have I come up with? Well I’m glad you asked…

My daughter and I made our own oat flour and used it to bake up some lovely applesauce muffins. I’ve made dozens of loaves of cornbread with a blend of fine and coarse cornmeal, a couple of eggs and some cream style corn— the results were delicious. But my biggest gluten-free success so far has to be macaroni n’ cheese. I swapped regular pasta for rice (I like Trader Joe’s brand the best), used arrowroot powder instead of flour in the roux for the cheese sauce, and punched up the flavor big time by using a combination of goat brie and cheddar. Afraid of that goaty flavor? Don’t be, it’s really subtle but makes a huge flavor impact and this combo seems to be loved by all. Seriously! My family thinks it’s one of the best versions of mac n’ cheese I’ve ever made, which is fantastic, but I really knew I was onto something when I served it at our July 4th barbecue. Not a single one of the dozen kids who were here had anything but “Is there more?” to say about it. I’ll take that as one big fat recipe success.

I guess you can say that I’m slowly learning to navigate the world of gluten-free living. I can almost imagine myself continuing to live this way if I can just conquer one all mighty obstacle… The ultimate crusty loaf of gluten-free bread. So stay tuned!

Gluten-Free Goat Brie + Cheddar Mac n’ Cheese
I make this with goat brie and my family loves it, but you can use all cheddar if you don’t think yours will.

glutenfree mac2

2 tbsp. butter
2 tbsp. arrowroot powder
1 1/2 cups skim milk, warmed
1/2 tsp. salt
1/2 tsp. garlic powder
1 tsp. Dijon mustard
4 oz. sharp cheddar cheese, diced
4 oz. wheel goat brie, peeled and diced
16 oz. gluten-free rice macaroni

  1. Begin cooking the macaroni according to package directions. While it cooks melt the butter in a medium saucepan.
  2. Add the arrowroot powder and whisk until it turns golden. (The key to using arrowroot is not to overheat it, otherwise it loses it’s thickening magic.)
  3. Slowly add the warm milk and whisk until the sauce has thickened. Add the garlic powder, salt and Dijon mustard and stir until well combined.
  4. Drain the macaroni and return to the pot. Add the diced cheese to the white sauce and stir until the sauce is smooth.
  5. Pour half the cheese sauce over the cooked macaroni and give it a gentle stir. Add additional sauce until the macaroni is coated to your liking. (I often have extra sauce that I use when I reheat the leftovers.)
  6. Serve, enjoy and be amazed at how tasty gluten-free can be!

smoked beer can chicken soup

Autumn is my favorite season. I love the chill in the air; I love the contrast between the bright blue sky and Mother Nature’s muted colors; I even love the cool, earthy and slightly damp way the world smells. Around this time each year I’m typically elbow deep in end of the season garden veggies; namely peppers, tomatoes, onions and eggplant. But not this year. This summers garden was a serious bust. I gave it just as much love as I ever do and the meager amount of veggies it produced was beyond disappointing. Sure my cucumber plants grew so voraciously we were eating cucumber with nearly every meal, but I got exactly two habanero and six bell peppers, the yellow and acorn squash flowered but then nada, the radishes and beets were nothing but greens and the tomato plants grew taller than me but only offered up a few handfuls of fruit. It broke my heart. What did truly flourish and produce in abundance were the tomatillos. The plants were so tall and willowy they resembled trees and each was covered stem to stern in little paper-thin green lanterns that would later be filled with the tomatillo fruit. It was the bountiful harvest I had been longing for. So you may be wondering, what did I do with all those lovely tomatillos? Well… I ate them sliced in salads and as a garnish for tacos. I made an insanely spicy Salsa Verde and I threw a handful in with some heirloom purple tomatoes for a kooky homemade pasta sauce. And I made soup.

Ours is a house of soup eaters, in fact my daughter is so crazy for soup that she’ll frequently request the leftovers for breakfast. No problem… In my mind there’s nothing like a warm comforting bowl of some homemade goodness to make a chilly Fall day (or morning) seem downright toasty. Believe it or not I’ve actually been planning for my first pot of Fall soup for a few months now. I know, seems a little crazy right? But it’s not really. You see my husband really honed his smoked beer can chicken technique this past summer. What started out as a good recipe in June turned into a killer recipe by August. It was so good that beer can chicken was the meal requested by my son’s friend the night he slept over. (And you know when a super picky 10 yr old requests one of your recipes it must be good!) Anyway, to ultimately get to this poultry of perfection recipe he made beer can chicken fairly frequently— sometimes as often as two weekends in a row. Mind you I’m not complaining, just explaining that we had a considerable amount of leftover chicken in the house and one can only eat so many chicken salad sandwiches! So, I decided to quietly squirrel away some of the leftover bits in the freezer in anticipation of that first pot of soup.

Fast forward to a chilly day in September, a day that begged for soup. Into the pot went some onion, a green pepper and a bunch of those lovely tomatillos. Out of the freezer came my carefully rationed chicken and an hour later… into our belly’s went some of the tastiest soup ever to come out of my kitchen.

And yes, my littlest love did in fact have a bowl of it for breakfast the next day.

beer can soup

Smoked Beer Can Chicken Soup
Any sort of leftover chicken will do but the smoked beer can really brings a nice flavor to the party.

3 tbsp. olive oil
2 cups diced onion
3 cloves garlic, minced
1 lb. tomatillos, husked, washed and diced
1 green bell pepper, diced
2 tsp. salt
1 tbsp. smoked paprika
1 tsp. ground cumin
1/4 tsp. chipotle chili powder
3 cups frozen corn, defrosted
2 15 oz. cans black beans, rinsed
8 cups chicken stock
4 cups leftover beer can chicken, cut into bite size pieces
Sliced jalapeño, fresh cilantro, avocado (optional garnish)

  1. In a large stockpot over medium heat warm the oil until it just begins to shimmer. Add the onions and cook until they become transparent. Then add the garlic, tomatillos and peppers. Season with salt and let cook until the tomatillos break down and become soupy.
  2. Add to the pot the spices, corn, black beans, stock and leftover chicken. Bring to a boil, reduce to a simmer and let cook for 10 minutes. Ladle into bowls and enjoy garnished with sliced jalapeño, fresh cilantro and avocado if you like.