sanity saving stir fry

There are some nights when dinner at our house is a leisurely, dare I say enjoyable affair; everyone is in a good mood, eats their meal without complaint and is rewarded with something rich and decadent for dessert. But then there are nights when everything is rushed, everyone has something to complain about and dessert is nothing more than yesterday’s memory. Sometimes I can anticipate ahead of time that were heading for disasterville and cook accordingly. Breakfast for dinner always makes them smile, my turkey meatloaf never fails to get a thumbs up and believe it or not any meal featuring shrimp is a Greco family favorite. Shrimp sautéed with onions and garlic over spaghetti, shrimp and veggie shish kabobs or even super easy shrimp stir fry is always a winner.

I’m a big fan of stir fries. They’re a great way to clean out your vegetable drawer, throw together a quick dinner and keep clean-up limited to one pan, one cutting board and one bowl for each person. I like to make mine with shrimp not only because everyone will eat it, but also because it literally cooks in minutes. I throw in a big variety of vegetables (this way any “offending” vegetables can be picked out and there will still be plenty remaining) and serve it over some brown rice with a few sliced scallions, chili flakes and soy sauce on top. Voilà! Dinner is served, peace reigns and all is once again right with the world. Until tomorrow night anyway…
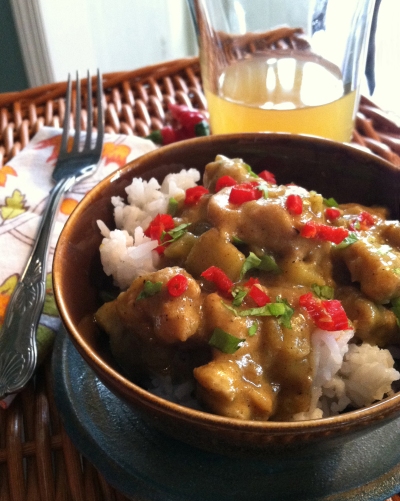
Shrimp Stir Fry
To really make this a quick weeknight dinner you can buy pre-cut veggies and use instant brown rice.

stir fry4A

1 lb. medium shrimp, peeled and deveined
1/3 cup water
2 tsp. toasted sesame oil
1/4 cup tamari soy sauce
1 tbsp. apple cider vinegar
1 tbsp. cornstarch
1 1/2 tsp. sugar

4 cloves garlic, minced
1 tbsp. fresh ginger, grated
5 cups mixed vegetables (broccoli florets, carrots, red peppers, etc.)
3 oz. snow peas
4 oz. sliced mushrooms
4 scallions, sliced thin
1 cup water chestnuts
2 tbsp. peanut oil
4 cups cooked brown rice, for serving
sliced scallions, for garnish
red chili flakes, for garnish
soy sauce, for garnish

  1. Place the cleaned shrimp in a small bowl. Mix together the water, sesame oil, soy sauce, vinegar, cornstarch, and sugar. Pour mixture over the shrimp and let marinate for 10 minutes. After 10 minutes remove the shrimp and set aside, but reserve the marinade.
  2. Cut the vegetable into bite-sized pieces. Heat the peanut oil in a wok or a 12-inch skillet over medium-high heat. Add the garlic, ginger and all the vegetables (except mushrooms and snow peas) and cook for 3 minutes, stirring frequently. Add the mushrooms and snow peas and cook another 2-3 minutes or until all the vegetables are nearly cooked through. Remove vegetables from pan and set aside.
  3. Add the marinade to the pan and heat until it begins to thicken. Add the shrimp and cook about 3-4 minutes or until shrimp are just pink. Stir in vegetables, coating evenly with the sauce, cover and let cook an additional 2-3 minutes until everything is heated through and the broccoli is crisp-tender. Serve over brown rice and garish with additional sliced scallions, chili flakes and soy sauce if you like.

*adapted from better homes and gardens

the house that mouse built

I know all you tried and true beets and blue cheese readers are patiently awaiting yet another pithy post from yours truly, and I thank you for it. But here’s the thing… this week you’re not getting one. You see my family and I are currently visiting the world of all things mouse, you know “the happiest (most expensive, crowded and over-whelming) place on Earth”. Yes, Disney. And while this multi-tasking gal is good, she’s not that good. So no amusing anecdotes or recipe this week, sorry!

Until next week (unless there’s a stampede at tonight’s character dinner that kills me) M.I.C.K.E.Y. M.O.U.S.E…image

little loves lemonade

My husband and I hold a garage sale every year and last weekend lemonade standwas it. At past sales we’ve sold everything from bikes and bassinets to the kids barely broken in winter boots and a first generation iMac. We’ve become something like pros at hawking our junk and keen negotiators with the hard-core pickers always looking for the best price. But this last sale was unlike any other we’ve ever held in that the kids decided to participate. How… with a good ol’ fashioned lemonade stand of course!

My little loves (that’s them at their stand) sold cups of homemade lemonade and mini chocolate-chocolate chip muffins to nearly everyone who visited our sale, not to mention a few unsuspecting individuals just out for a walk. They worked hard promoting their product and played the cute kid card big time— it totally payed off for them. Their little enterprise was such a huge success that not only did they sell out of 4 gallons of homemade lemonade and 48 mini muffins, but they did so way before the garage sale was over! Not everyone bought from us, but almost everyone bought from them.

So if you’re contemplating a garage sale over the next few months I highly recommend encouraging the kids to run a lemonade stand as well. And if you’ve got some Amway products, Girl Scout cookies or a little Avon you’re looking to move fast, I just may have the salespeople for you!

Classic Homemade Lemonade
This is lemonade is super easy to make and tastes nothing like the powdered stuff in a can. Give it a try once and I promise you’ll never go back!

lemonade2

Lemonade
2 cups simple syrup (see recipe below)
2 cups fresh lemon juice* (about 12 lemons)
4 cups water

  1. In a large pitcher stir together the fresh juice and simple syrup. Add the water, tasting as you go, until the lemonade is as sweet/tart as you like it.
  2. Serve in tall glasses garnished with a sprig of mint or a slice of fresh lemon and enjoy.

Simple Syrup
2 cups water
2 cups sugar

  1. Add the water and sugar to a pan and heat. Stir frequently, until sugar fully dissolves and the syrup becomes clear, about 4-5 minutes.
  2. Let cool and store in the refrigerator until ready to use.

*When lemons are on sale I buy and squeeze enough for 2 cups of juice, but when they’re not I use half fresh juice and half bottled. It’s slightly less amazing than entirely fresh squeezed, but still miles better than the “just add water” canned stuff.

*adapted from whats cooking america

Chocolate-Chocolate Chip Mini Muffins
These mini muffins are truly the perfect one bite chocolate fix. However the same recipe can be used for full sized muffins, simply adjust the baking time.

1 3/4 cups all-purpose flour
1/2 cup packed brown sugar
1/4 cup unsweetened dark cocoa powder
1 tsp. baking powder
1 tsp. baking soda
1/4 tsp. salt
1/2 cup mini chocolate chips
1 large egg, beaten
1 cup water
1/4 cup canola oil
1 tbsp. red wine
1 tsp. vanilla extract

  1. Preheat oven to 350°F. Combine flour, brown sugar, cocoa, baking powder, baking soda, salt and mini chips in a large bowl.
  2. In a small bowl whisk together the egg, water, oil, wine and vanilla. Add oil mixture to flour mixture and stir until all the ingredients are fully incorporated.
  3. Place the liners in the muffin pan and lightly coat with cooking spray. Add a dollop of batter to each prepared muffin cup and sprinkle a few mini chips on the top of each.
  4. Bake mini muffins for 12-14 minutes (full size for 18-22 minutes) or until a toothpick inserted in center comes out clean. Cool for 5 minutes in the pan before transferring to a wire rack.

*adapted from cooking light

life altering hummus

When my son was little he was a real picky eater. The first solid food he ever ate was avocado and he loved it; but then along came toddler free will and out the window went adventurous eating. Most of his likes and dislikes were based solely on the appearance rather than taste, it used to drive me crazy! Night’s when he actually ate what the rest of the family did felt like a huge victory to me. Uggh, mealtimes those first few years were not fun!

Refusing to be undone by this kids’ unfounded rejection of perfectly delicious food, I started experimenting with a little mom sleight of hand. I looked for any way to make the “kid food” he was willing to eat healthier. Carrots and celery puréed into the red sauce I used on pizza, homemade fish sticks and chicken tenders, black beans added to brownies (not a big hit) and hummus as a dipper for crackers and pretzels. Yup you read right, good ol’ garlicky hummus. My picky guy wouldn’t touch a perfectly non-threatening string bean, an innocuous burger or a simple bowl of soup; but he would eat hummus like it was going out of style. Hummus sandwiches, hummus on pretzels, hummus with his chicken tenders… and I can’t even tell you how often he sat down with a big bowl of hummus and a spoon. People thought I was crazy, but he loved it! And I loved that he was eating something full of protein, loaded with heart-healthy garlic (during his hummus years he never had a mosquito bite!) and more exotic than mac n’ cheese or pb&j. Needless to say I quickly developed a hummus recipe of my own and could whip up a batch in flash.

Thankfully he’s no longer a picky eater, but it didn’t happen overnight. He’ll now eat almost anything I put in front of him as long as it’s not spicy and is loaded with garlic. Yet hummus still plays a big role in our house. My daughter, who thankfully is far less suspicious of unfamiliar foods then he ever was, happens to be a hummus junkie as well. In fact just yesterday her lunch request was a bowl of hummus and some baby carrots. Ya gotta love it!

Who knew that a simple bowl of garlicky hummus in your formative years could turn into an enduring love of strong flavors and a willingness to try unfamiliar food. Seriously, who knew?!?

Homemade Hummus
You can adjust the amount of garlic in the recipe to your taste or slow roast it before hand to mellow out the flavor.

hummus4

1 can chickpeas, drained and rinsed
3-4 cloves garlic
1/2 tsp. salt
3 tbsp. tahini
3 tbsp. olive oil
4 tbsp. plain yogurt
1 tbsp. water
3 tbsp. lemon juice
1/4 tsp. cumin
1/4 tsp. smoked paprika

  1. Put everything in the bowl of a food processor and pulse until smooth.
  2. Spoon into a serving dish, drizzle the top with olive oil and sprinkle with a bit of smoked paprika. Serve with toasted pita chips and fresh vegetables, or a spoon.

“we’re starving!” snack bars

I don’t know about your kids but when mine come home from school they usually ask for a snack. Snacks before dinner are tricky; too much and they don’t eat dinner, too little and they complain that they’re STARVING until dinners ready. I always try to offer them something healthy (which they usually accept without complaint) but sometimes even I know that baby carrots just won’t cut it. Sometimes a snack needs to be healthy, but seem like a treat. Hello homemade snack bars.

I’ve been on a mission to make a granola/snack bar for sometime, but something always went wrong. Too crumbly. Too sticky. Too blech… But being the tenacious type and all, I kept on trying. The recipe I finally achieved success with is super easy; it really only requires melting and mixing; is pretty healthy; almond butter, puffed brown rice, dried cranberries (yeah there’s mini chocolate chips, but just a few) and most importantly my kids love them.

Here’s hoping that yours do as well and that these tasty snack bars buy you a few pre-dinner hours free from starving people underfoot.

Crispy Almond Snack Bars
These bars can easily be adapted to fit your kids’ likes; soy nut butter instead of almond, raisins instead of cranberries and mini m&m’s instead of chips. Go crazy, you have my permission!

new bars2

2 tbsp. butter
1/3 cup chunky almond butter
1/3 cup honey
2 cups puffed brown rice cereal
1/3 cup dried cranberries
1/2 cup slivered almonds, toasted and chopped
1/4 cup mini chocolate chips

  1. Line an 8×8 pan with parchment or wax paper and set aside. In a small sauté pan toast the almonds. Allow to cool slightly and roughly chop.
  2. Place the cereal, almonds and dried cranberries in a large bowl, being sure that cranberries are not all clumped together. Set aside.
  3. In the pan you used to toast the almonds melt together the butter and almond butter, stirring frequently. Remove from heat, add the honey and stir until fully incorporated. Pour the mixture over the cereal and stir to evenly coat.
  4. Press the cereal mixture into the parchment lined pan. Scatter the top with chocolate chips and lightly press them into the sticky cereal mixture. Place the pan in the freezer for 20 minutes to set.
  5. Remove from the freezer, use the parchment paper to lift the contents out and slice into individual bars. Store in the refrigerator in an air tight container between sheets of waxed paper.

nana’s sweet apple + chicken curry

jim+nanaMy husband comes from a long line of stovetop dusting, dialing for dinner, non-cooks. This is not a criticism, rather a statement of fact. If pressed they can all whip up a perfectly fine meal, they just would rather not. However amidst all the pizza, McDonald’s and chicken rondelets of his childhood one truly from scratch meal does proudly stand out in his memories:
his grandmother’s curry.

I too happen to love curry and have made more than a few versions over the years. My husbands reaction to my curry however is always the same… sheer delight that curry is for dinner followed quickly by disappointment that it’s not like his grandmother’s. She traditionally makes curry with the leftover lamb or pork roast from a holiday dinner, to which she adds sweet apples, onions and a little bit of spice. I’m from the coconut milk, peanut, cilantro school of curry— which I imagine is why we’re at a curry crossroads. I’ve asked her for the recipe before, in fact we spoke about it before I attempted my version, but she says she doesn’t really have one. She’s been making her curry for so long that she just knows when its right. Oh well.

The other day I was reading the food section of the paper and lo and behold there was a recipe for Sweet Apple Curry which sounded exactly like the curry my husband’s childhood memories were based on. The article claimed that as far a curries go this recipe was totally inauthentic, but absolutely delicious nonetheless. Naturally I headed straight to the store and set about attempting to duplicate his Nana’s beloved recipe.

I’m not a big fan of lamb and pork just didn’t seem right to me, so I used chicken thighs instead. I served it on Jasmine rice just like she does and I kept it fragrant, flavorful and mildly spiced. Seriously I pulled out all the memory triggering stops on this one and I’ll give you one guess how it turned out… A total success! My other half said it was the closest thing to his Nana’s that he’d ever had. Quite the compliment indeed! Just like the article said; inauthentic but delicious.

So if you know Ginny and love her famous post-holiday curry, rest assured that her recipe (or at least an approximation of it) can now live on…

Sweet Apple & Chicken Curry
This is a sweet and mild curry, however if you’re like me and enjoy a little kick in everything you eat add a few diced chilies for garnish.

nanas curry2

3 ribs celery, diced
2 large onions, diced
4 cloves garlic, grated
3 Granny Smith apples, peeled and cored
3 lbs. boneless/skinless chicken thighs
1/2 cup flour
1/2 tsp. pink salt
1/2 tsp. black pepper
6 tbsp. olive oil, divided
4 tbsp. unsalted butter
2 tbsp. mild curry powder
1 tsp. ground cinnamon
1 tsp. ground cumin
1/4 cup flour
3 cups chicken broth
1 tbsp. corn starch
1 tbsp. cold water
Jasmine rice, for serving
minced fresh cilantro, for garnish (optional)
diced chilies, for garnish (optional)

  1. Trim the chicken and cut into bite-size pieces. Place in a quart-size ziploc bag, along with 1/2 cup of flour, salt and pepper. Seal and shake to coat evenly. Set aside.
  2. Dice the celery and onion and grate the garlic, set aside. Peel and core the apples and cut them into medium-size chunks. Set aside in a separate bowl.
  3. Heat the oil, 2 tablespoons at a time, in a pot over medium heat. Working in batches, add the coated chicken and cook until lightly browned on all sides; transfer to a bowl.
  4. Melt the butter in the pot you just finished browning the chicken in. Add the celery, onion and garlic and cook for 5 minutes, stirring frequently, until the onions have become transparent. Add the apples and stir to incorporate; cook for another 5 minutes, then add in the curry powder, cinnamon and cumin. Cook for 2 minutes, until the spices become fragrant.
  5. Sprinkle the apple mixture with a 1/4 cup of flour and stir to incorporate. Cook for 2 minutes, then add the broth along with the chicken pieces and any accumulated juices. Increase the heat to medium-high and bring mixture to a simmer. In a small dish mix together the corn starch and cold water. Add it to the curry mixture and allow to simmer for about 10 minutes, until the sauce has thickened and the chicken is cooked through.
  6. When finished, remove the pan from the heat and let sit for a several minutes before serving. Serve over hot Jasmine rice and garnish with diced cilantro and diced chilies, if you like.

*adapted from the washington post

pickled red onions

Last weekend I decided to drag out my crock pot and make a little pulled pork. I didn’t have a pulled pork recipe to follow, but what I did have was the recipe for those crazy good Pulled Turkey Tacos that I blogged about a while ago. I figured I could swap a pork loin for the turkey cutlets and serve it on rolls instead of soft taco shells. And so a pulled pork recipe was born.

The pulled pork turned out just as I had hoped; the meat was super tender, it had just the right amount of sauce and it was a touch spicy but not so much so that the kids declared it inedible. And one of the best things about having a crock pot full of pulled pork— there’s always plenty of leftovers for during the week! Not surprisingly I decided to serve the leftovers as soft taco filling, just as I had the pulled turkey. But while the turkey tacos were delicious with your standard issue cheese, lettuce, sour cream etc., I wanted to jazz my pulled pork tacos up a bit. How you may ask, well with pickled red onions of course! I already had it in my mind that I wanted to try pickling my own onions (I had tried to make cucumbers last summer and they ended in disaster), so now that pulled pork tacos were on the menu it seemed like perfect timing.

The onions were amazing! I added them to the pulled pork soft taco along with some aged cheddar and fresh cilantro and it seriously made a good taco into an extraordinary one.

Pickled Red Onions
These pickled onions are a fantastic addition to tacos, sandwiches and salads. They add a lovely bright and fresh crunch.

pickled onion in jar

1 1/2 cups red wine vinegar
1/4 cup water
2 tbsp. sugar
1 tbsp. kosher salt
1 medium red onion, halved and thinly sliced

  1. In a small saucepan stir together the vinegar, water, sugar and salt and bring to a boil. Remove from the heat and let cool for 20 minutes.
  2. Placed the sliced onion in a glass jar and pour the vinegar brine over it. Squish the onion down so that it is fully submerged in the brine, cover and refrigerate for at least 24 hours before serving.

*adapted from rachel ray/bobby flay

asian inspired salmon burgers

I’ve already told you that ours is a fish eating house; sautéed grouper, grilled clams and mussels, stir fried shrimp and of course my award winning baked fish sticks. And while this pleases me, what would make me even happier is if my family would agree to eat fishier fish— ya know the ones loaded with Omega 3’s. Perhaps some sardines or a few anchovies, a salmon filet or even canned Albacore tuna once in a while. But the three of them (my husband included) all make such a fuss at the mere suggestion, that I don’t even bother giving a fishy fish dinner a shot. Sometimes I sneak a few sardines into my stir fry or add a couple of anchovies when I’m sautéing onion and garlic for red sauce, but the quantity is so small that I’m sure the health benefits are minimal. (Sigh) It really is too bad.

However much to their chagrin, I do find myself making more fish dishes around this time every year. We happen to be in the midst of the Lenten season and while my family does not prescribe to the “Fish on Friday” rule, I can’t help but notice that the seafood at my local grocery store seems to be at its freshest and best price during Lent. And who am I after all to ignore a good sale?!?

Some of my seafood experiments have been definite hits, some huge misses and some eaten and tolerated without complaint, but clearly not enjoyed. Sometimes it makes me sad that my family doesn’t like the dinner I’ve made and sometimes it delights me when they do. And sometimes… Sometimes I think what I’ve made is delicious and I honestly don’t care what the rest of them think— more leftovers for me! Which is exactly what happened the other night when salmon was $4.99 a pound.

I happen to love most fish, but boneless skinless sardines and salmon are two of my favorites. Imagine my delight when I walked into the grocery store one Friday only to discover that salmon filets were on sale for half of their usual price. (I was almost as happy as the weekend broccoli rabe was $1.99 a pound. Yeah, that happy!) Anyway once I drew the line in the sand and made the decision to serve salmon for dinner, I was tasked with the job of finding a recipe to win over my family of non-salmon lovers over. They all seem to like the flavor combination of ginger, garlic and soy sauce, so I thought that would be the way to go. And I thought that if I could offer up this less than loved ingredient in a much loved form, it would be more readily accepted. What does my family love? Well burgers of course, so I went with salmon burgers loaded with all the Asian flavors I knew they enjoyed.

The resulting burgers were relatively easy to make, cooked up in a matter of minutes and succeeded in finally getting some Omega 3’s into my families bellies. And what did said family think? Well, they all ate the burgers without complaint but also without compliment or request for a repeat performance. I however thought the burgers were delicious!

While I won’t force them to eat salmon again for a while, they can surely bet on these burgers popping up again for dinner sometime in the future.

Asian Inspired Salmon Burgers
I like these topped with a little hoisin sauce, a few slices of English cucumber and some fresh cilantro. They’re also fantastic on a bed of spinach tossed with cilantro, raw onion and diced cucumbers and drizzled with the homemade hoisin sauce.

salmon burger

1 3/4 lbs. skinless salmon filet, finely chopped
1/2 cup plain panko crumbs
1 tbsp. toasted sesame seeds
2 cloves garlic, minced
4 green onions, thinly sliced
2 tbsp. fresh cilantro, minced
1 tbsp. tamari soy sauce
3 tsp. fresh grated ginger
1 tsp. lime zest
1 large egg
1 tsp. toasted sesame oil
2 tbsp. peanut oil (or canola), divided
2 tbsp. hoisin sauce (homemade or bottled), for garnish
English cucumber sliced thin, for garnish
additional cilantro, for garnish
5-6 sesame seed hamburger buns, optional

  1. Finely chop the salmon filet and place in a large bowl.* Combine all the remaining ingredients (through sesame oil) and add to the salmon. Mix well with a fork until everything is fully incorporated. Divide the mixture into 5-6 equal portions, gently shaping each into a patty. Place the patties on a plate and chill for at least 45 minutes.
  2. Heat a large non-stick skillet over medium-high heat. Add the peanut oil to pan; swirl to coat. Add the patties and cook for 4-5 minutes on each side or until done.
  3. Place a patty on the bottom half of each bun; top each with a spoonful of hoisin sauce, several cucumber slices, a few sprigs of cilantro and the top half of bun.

*The first time I made this recipe I used my food processor to do the chopping and ended up with salmon paste, it tasted fine but the texture was unpleasant. Chopping the fish by hand takes more time but it’s worth the effort.

*adapted from cooking light

Homemade Hoisin Sauce
You don’t have to make this from scratch, but why buy a whole bottle when all you really need is a couple of spoonfuls?

1 1/2 tbsp. tamari soy sauce
1 tbsp. creamy peanut butter
1/2 tbsp. molasses
1 tsp. rice wine vinegar
1/4 tsp. garlic powder
1 tsp. sesame oil
1/8 tsp. hot sauce
1/8 tsp. black pepper.

  1. Blend everything together really well (I used a mini chopper) and set aside.

*adapted from food.com

an irishman for a day

I consider myself relatively fearless in the kitchen. I’m willing to try just about any technique, recipe or style of cooking at least once and I’m confident enough in my abilities that I can improvise if/when things go awry. However all that goes out the window when we’re talking about bread baking. No matter how many times I attempt to bake a nice crusty loaf of bread the results turn out disappointing. I don’t know if it’s my own impatience with the whole proofing, kneading, rising process or if I’m choosing overly complicated recipes, but every time without failure… failure.

Since next weekend is St. Patrick’s Day and EVERYONE is officially Irish for a solid 12 hours, I like most of America will be cooking up what we imagine to be true Irish fare… soda bread and something that takes several hours of slow cooking to go along with it. Usually that means corned beef but this year I’ve decided to branch out a bit, to make something that wasn’t so reliant on the quality of the pre-brined corned beef I purchased. Rather I was looking for a recipe that required real honest cooking and that I had more control over (I like control). Anyway I decided that this St. Patty’s my family would be feasting on homemade soda bread and Chicken Stout Stew. Since soda bread by nature is really much more like a quick bread than a yeast bread, I considered it to be far less intimidating and chicken stew with a nice hardy stout in the gravy— how could I miss?

Well it turns out that I couldn’t… The stew was so tasty and my soda bread so successful that we briefly considered changing out last name to O’Greco.

Éirinn go Brách and sláinte!

Irish Soda Bread
This is one of my all time favorite breads. It’s perfect alongside some stew or toasted and slathered with jam for breakfast. It’s easy to throw together, doesn’t require much advance prep and it comes out delicious every time.

soda bread2

3 3/4 cups unbleached all-purpose flour
3 tablespoons white sugar
1 teaspoon baking soda
3/4 teaspoon salt
2/3 cup raisins
4 tbsp. butter, frozen
1 1/3 cups + 1 tbsp. light buttermilk
1 large egg

  1. Preheat oven to 350°F. Line a cookie sheet with parchment paper and set aside.
  2. In a medium-sized mixing bowl, whisk together the flour, sugar, baking soda, salt, and raisins. Using a box grater grate the frozen butter into the flour mixture. Sir with a fork and set aside.
  3. In a small bowl whisk together the buttermilk and egg. Pour the wet mixture into the dry ingredients and stir to combine. Knead the dough a couple of times before forming it into a ball. Place the loaf on the prepared cookie sheet and use cooking sheers (or a sharp knife) to cut a deep ‘x’ across the top of the loaf.
  4. Bake the bread for 45-55 minutes, until it’s golden brown and a tooth pick inserted into the center comes out clean. Remove the bread from the oven and allow to cool on a rack before slicing.

*adapted from king arthur flour

Chicken Stout Stew
This recipe calls for chicken thighs, which happen to be perfect for slow cooking. I won’t deny that they take a bit more time to trim and clean, but if you were to use chicken breast instead it would undoubtedly be dry and disappointing. I promise that the extra effort will totally be worth it.

stout stew2

6 tablespoons plus 1/2 cup all-purpose flour, divided
2 tsp. salt
1/2 tsp. ground black pepper
2 1/2 lbs. boneless/skinless chicken thighs, trimmed and cubed
6 tsp. extra-virgin olive oil, divided
7 slices quality turkey bacon, diced
4 cups chopped onion
7 cloves garlic, minced
1 14 oz can Guinness beer (or other stout)
1 lb. whole baby carrots
12 small potatoes, quartered
6 springs fresh thyme
2 tbsp. Worcestershire sauce
1 3/4 cup chicken broth
2 cups frozen baby peas

1 lb. button mushrooms, sliced
2 tbsp. butter
1 tsp. salt
3 sprigs fresh thyme

  1. Combine 6 tablespoons flour with salt and pepper in a ziploc bag. Trim and cube the chicken and add to the bag. Seal the bag and shake to dredge the chicken thighs in the flour mixture.
  2. Heat 2 teaspoons oil in a large skillet over medium-high heat. Working in batches, add the chicken and cook until lightly browned on all sides, transfer to the slow cooker. Continue with the remaining chicken, adding additional oil to the pan as needed, and reserve the seasoned flour that remains.
  3. Add the diced bacon, onion and garlic to the pan and cook for 2-3 minutes. Sprinkle the seasoned flour that remains from dredging the chicken over the bacon mixture and cook, stirring frequently, for 8 minutes more. (The fat and flour will create a light-colored roux.) Add the stout and stir, being sure to scrape up any browned bits from the bottom of the pan.
  4. Pour the bacon mixture over the chicken and add the carrots, potatoes and thyme. Pour the broth and Worcestershire sauce over the top and give everything a good stir.
  5. Cover and cook on medium 4 1/2 hours, until the chicken is falling-apart tender.
  6. When the stew is nearly done add the frozen peas and allow to continue cooking until the peas are heated through. Meanwhile sautee the mushrooms with the salt and thyme until they are nicely browned and all the moisture in the bottom of the pan has cooked off. Add the mushrooms to the stew, season with additional salt and pepper if needed and serve with a little soda bead.

*adapted from eating well

Hooray for a Giveaway!~ Has Ended

I’m one of those people who delight in the process of planning a meal almost as much as I do cooking and eating it. I truly enjoy researching recipes, making endless lists and shopping for ingredients. But, I realize that not everyone feels the way I do.

I recently posted a bit of a love letter to the Shim’on Ariche Harissa Forte that I can only find at my local Fairway. I also contacted them to request that they sell it in larger sized jars. Well that request turned into a couple of back and forth e-mails that turned into beets and blue cheese’s first sponsored giveaway!

It turns out that besides being a fantastic resource for your everyday grocery and wine needs, Fairway also offers an extensive catering menu for any size gathering or holiday meal (kosher and non-kosher). Who knew?!? The folks at Fairway Market have given me a $100 gift card to give away to one of you— wasn’t that nice of them? With Passover and Easter right around the corner a Fairway gift card would certainly buy some lovely ingredients. Or, you could cater in and pretend you cooked (I won’t tell). And not to fear if you don’t happen to have a Fairway near you, they also offer online ordering. So here’s what you have to do…

giveaway image

To enter, please leave a comment with what you love most about grocery shopping. Are you like me and you love the process of planning meals; making lists and finally selecting the perfect brussels sprout or artichoke. Is it the only time during the week that you’re actually kid-free? Or do you dread those brightly lit and jam-packed aisles and avoid it whenever possible? Whatever you have to say about grocery shopping, and even more specifically shopping at Fairway, I’d love to hear it.

Please leave your comment between Wednesday, March 6, 2013 and Wednesday, March 20, 2013. One comment per person please, US residents only. Entries must be left via the comment form at the bottom of this post. A winner will be selected using Random.org. on Thursday, March 21st and will be promptly contacted.

So please leave a comment and then feel free to…

  • Follow @beetsbluecheese on Twitter.
  • Become a beets and blue cheese follower via e-mail
    (you’ll find the “follow me” button at the top of this page).
  • Like beets and blue cheese’s facebook page.
  • Share this giveaway with your friends on Facebook and Twitter.

Good luck!

bitter, spicy + obsessed

There are two types of people in this world; those who enjoy sweet, mellow and subtly spiced food and those who prefer savory, assertive and intensely flavored dishes. I happen to fall in the later category; give me salty chips, strong coffee and spicy vindaloo and I’m a happy girl.

Whether I’m at Shop Rite or one of the ethnic grocery stores I like to frequent, I’m always on the lookout for interesting foods or ingredients to try. I recently discovered Shim’on Ariche Harissa Forte at Fairway and I’ve become a bit obsessed with this little condiment. Harissa is a spicy paste of chili peppers, garlic and salt that adds a delicious kick to everything and anything. I’ve been putting it on everything from grilled chicken and salads to sunny-side-up eggs and my morning toast. (Sometimes when I need a little pick me up, I actually eat it by the spoonfull right out of the jar.) The other thing I can’t seem to get enough of these days is broccoli rabe— I just love, love, love this bitter green! I usually sauté it with garlic, olive oil and some harissa (of course) and then throw in a few chickpeas or poach an egg for on top. Delicious!

You already know that I make a lot of soup, so it seemed like a natural progression to try to incorporate my harissa/broccoli rabe obsession with my soup infatuation. Happily this proved far easier to do then I expected. The soup turned out to be wonderfully soothing creation; filled with fiber rich beans, super antioxidant broccoli rabe, and some fantastic chicken sausage just to round things out. I added a little harissa for a background kick of metabolism boosting heat and served it with a sprinkle of grated Parmigiano-Reggiano. A simple bowl was enough to put a smile on my face!

But my quest to combine my two latest obsessions didn’t stop there, my final creation was a panini of broccoli rabe sautéed with garlic and anchovies, a little fresh mozzarella and a hearty schmear of harissa all sandwiched between some lovely fresh ciabatta bread. Man it was good, just typing these words makes me want to hit save and head into the kitchen for another one.

I realize I have a bit of a bitter/spicy monkey on my back, but I’m okay with it. Thankfully we have a Fairway close by so I’m never without this obsession evoking condiment or my favorite greens for long. However if anyone from Fairway is reading this… I’m begging you, please start selling the harissa in larger jars. I don’t have enough pantry space for all the little jars required to feed my need!

Broccoli Rabe & Fresh Mozzarella Panini
This would no doubt be equally delicious with a couple slices of sharp provolone or perhaps a combination of mozzarella and provolone. But— even if you don’t like anchovies don’t omit them, the flavor is very subtle but it really does make a difference.

panini2

1/2 a bunch of fresh broccoli rabe, chopped into thirds
4 flat anchovies packed in oil, finely chopped
4-6 garlic cloves, sliced thin
1 tbsp. extra-virgin olive oil
pinch of salt
2 wedges ciabetta bread (or other hearty bread), sliced in half
4 thin slices fresh mozzarella
harissa

  1. Quickly steam (or blanch) the broccoli rabe until it is just crisp tender and set aside.
  2. Cook the anchovies and garlic in olive oil until the garlic just begins to turn golden and the anchovies begin to dissolve, about 2-3 minutes. Add the broccoli rabe to the pan, sprinkle it with a pinch of salt and cook (stirring frequently) an additional 3-4 minutes.
  3. Heat a panini or sandwich press according to manufacturer’s instructions until hot. Brush one side of the bread slices with olive oil and place on a work surface. Layer the broccoli rabe mixture and two slices of mozzarella on each bottom slice. Spread the top slice with harissa and place on the sandwich.
  4. Put sandwiches on the press, pull down the top and cook until the cheese has melted and the ciabatta is browned and crisp, 4 to 7 minutes.

Broccoli Rabe & Chicken Sausage Soup
This soup is one of my all time favorites. It’s makes a wonderfully satisfying lunch and is perfect with a simple panini for dinner.broccoli rabe soup3

3 tbsp. olive oil
1 lb. chicken sausage, sliced into bite sized pieces
1 large onion, chopped
1 cup carrot, diced
4 cloves garlic, minced
1 bay leaf
1/4 tsp. black pepper
2 cans small white beans, rinsed and drained
1 bunch broccoli rabe, chopped into 1″ pieces
2 quarts chicken stock
4 tsp. harissa
grated Parmigiano-Reggiano, garnish

  1. Heat olive oil in a medium stock pot over high heat. Add the sausage and brown 2-3 minutes, breaking up any large pieces.
  2. Add the carrots, onion and garlic and cook for 5 minutes, until the vegetable begin to soften. Add the chopped broccoli rabe, stir well to coat with the vegetable mixture and allow to cook 1-2 minutes until the greens begin to wilt.
  3. Add to the pot the chicken stock, bay leaf, harissa and beans and bring soup to a boil. Reduce heat to simmer, cover and cook for 15 minutes.
  4. Fish out bay leaf, adjust seasonings and serve with grated cheese and some crusty bread.

coconut body butter

I love coconut; Mounds Bars and macaroons, Thai curry and Mulligatawny soup, shampoo and conditioner. If it’s coconut, it’s for me! The other day the kids and I were roaming around Trader Joe’s (well I was roaming they were desperately searching for Sammy the Shark) when I overheard a conversation in the spice section. A woman was saying how she uses virgin coconut oil all winter long as a moisturizer and hair conditioner. Hmmm, I knew it was considered a healthy fat and I use virgin coconut oil in all my curries and sometimes when I bake, but I never thought of using it topically. Apparently I’m rather late to the coconut oil party because the internet is filled with tales of its immune boosting, anti-fungal, anti-bacterial and anti-inflammatory qualities. Not to mention that it makes a great moisturizer. Go figure!

If you’re already familiar with coconut oil then you know it’s firm at room temperature and will liquify with just the warmth of your hand. But, what I discovered is that if you whip a little air into it suddenly you have a creamy (more temperature stable) body butter that works great at soothing dry winter skin and makes you smell like the tropics. Coconut oil body butter, you had me at hello…

Coconut Oil Body Butter
Initially this body butter will have a greasy consistency and a little bit definitely goes a long way, but it absorbs fairly quickly into your skin and leaves you smelling delicious.

coconut butter2

1 cup virgin coconut oil

  1. Place the solid coconut oil in the bowl of a stand mixer fitted with a whisk attachment.
  2. Turn the mixer to high and let process for 8-10 minutes, occasionally scraping down the sides of the bowl.
  3. When the coconut oil has become creamy and light transfer it to a glass jar and store at room temperature. If at any point it begins to liquefy just pop it into the refrigerator to chill a bit.

*adapted from living the nourished life